You can use port forwarding to:
- Case 1. Debug a tab opened on a different Chrome instance.
- Case 2. Host a site on a development machine web server, then access the content from an Android device through a USB cable.
In Case 2, port forwarding works through a listening TCP port on your Android device that maps to a TCP port on your development machine. Traffic between the ports travel through the USB connection between your Android device and development machine, so the connection doesn't depend on your network configuration.
Additionally, if your web server is using a custom domain, you can set up your Android device to access the content at that domain with custom domain mapping.
Set up port forwarding
Depending on your case, follow the next steps.
Case 1: Set up port forwarding to another Chrome instance
Run another Chrome instance with the
--remote-debugging-port=PORTparameter, for example:MacOS
open -a "Google Chrome" --args --remote-debugging-port=PORTWindows
start chrome --remote-debugging-port=PORTLinux
google-chrome --remote-debugging-port=PORTIn the Chrome instance you are debugging with:
- Open
chrome://inspect/#devices. - Make sure
Discover network targets is checked.
- Click Configure next to the checkbox.
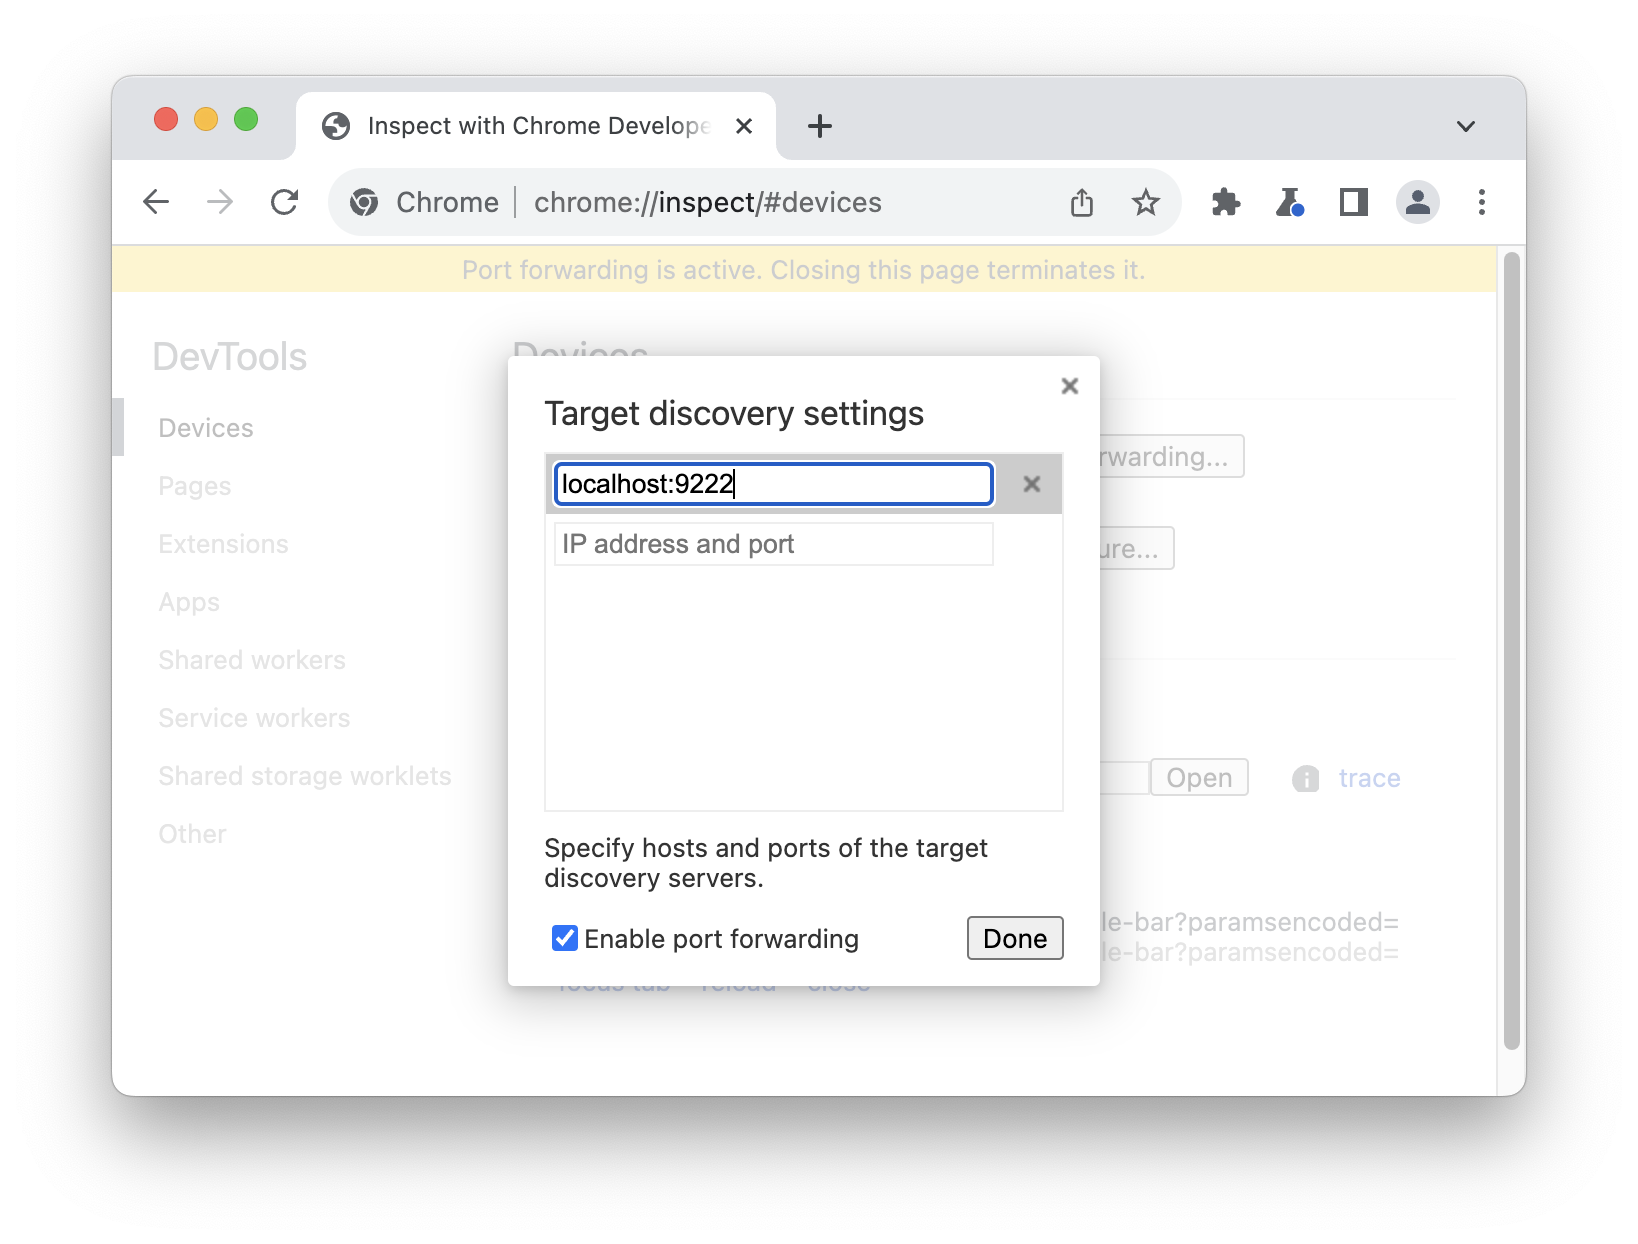
In Target discovery settings, enter
localhost:PORT, checkEnable port forwarding, and click Done.
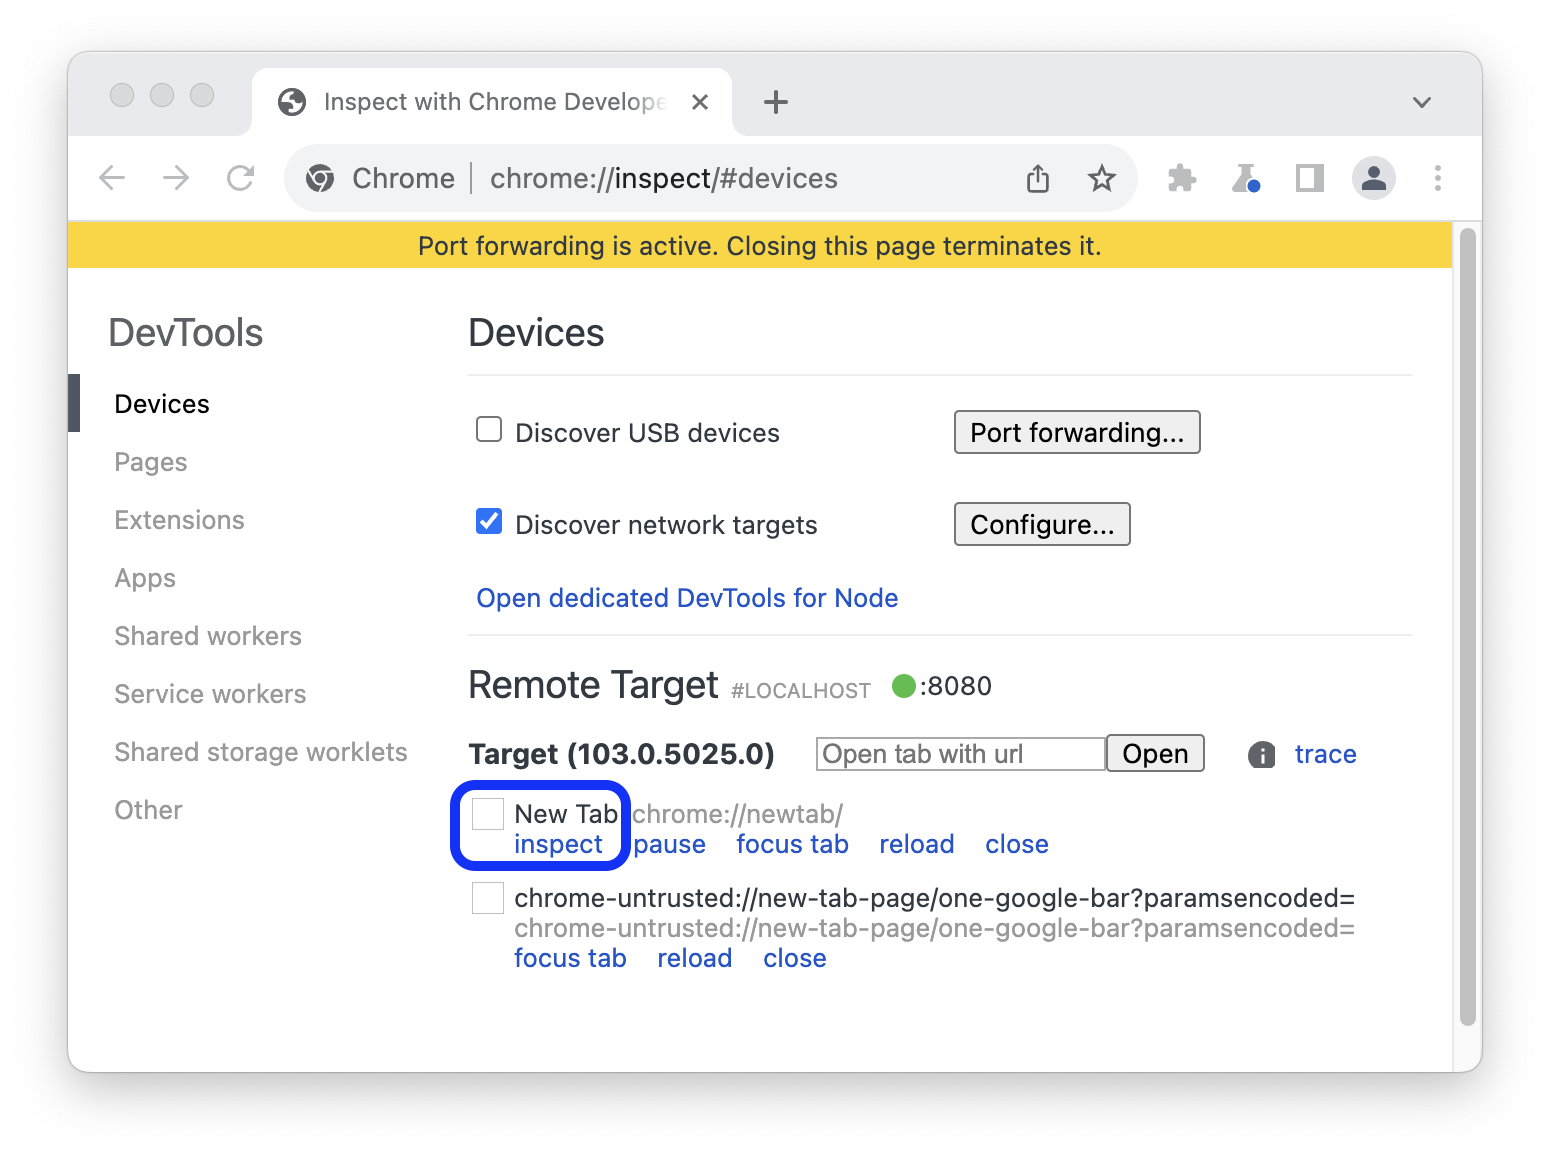
Back in Devices, you'll see a new remote target. Click inspect next to the tab you want to debug.
- Open
A new DevTools window in device mode opens. In the address bar at the top, you can enter the address of the website you want to debug.
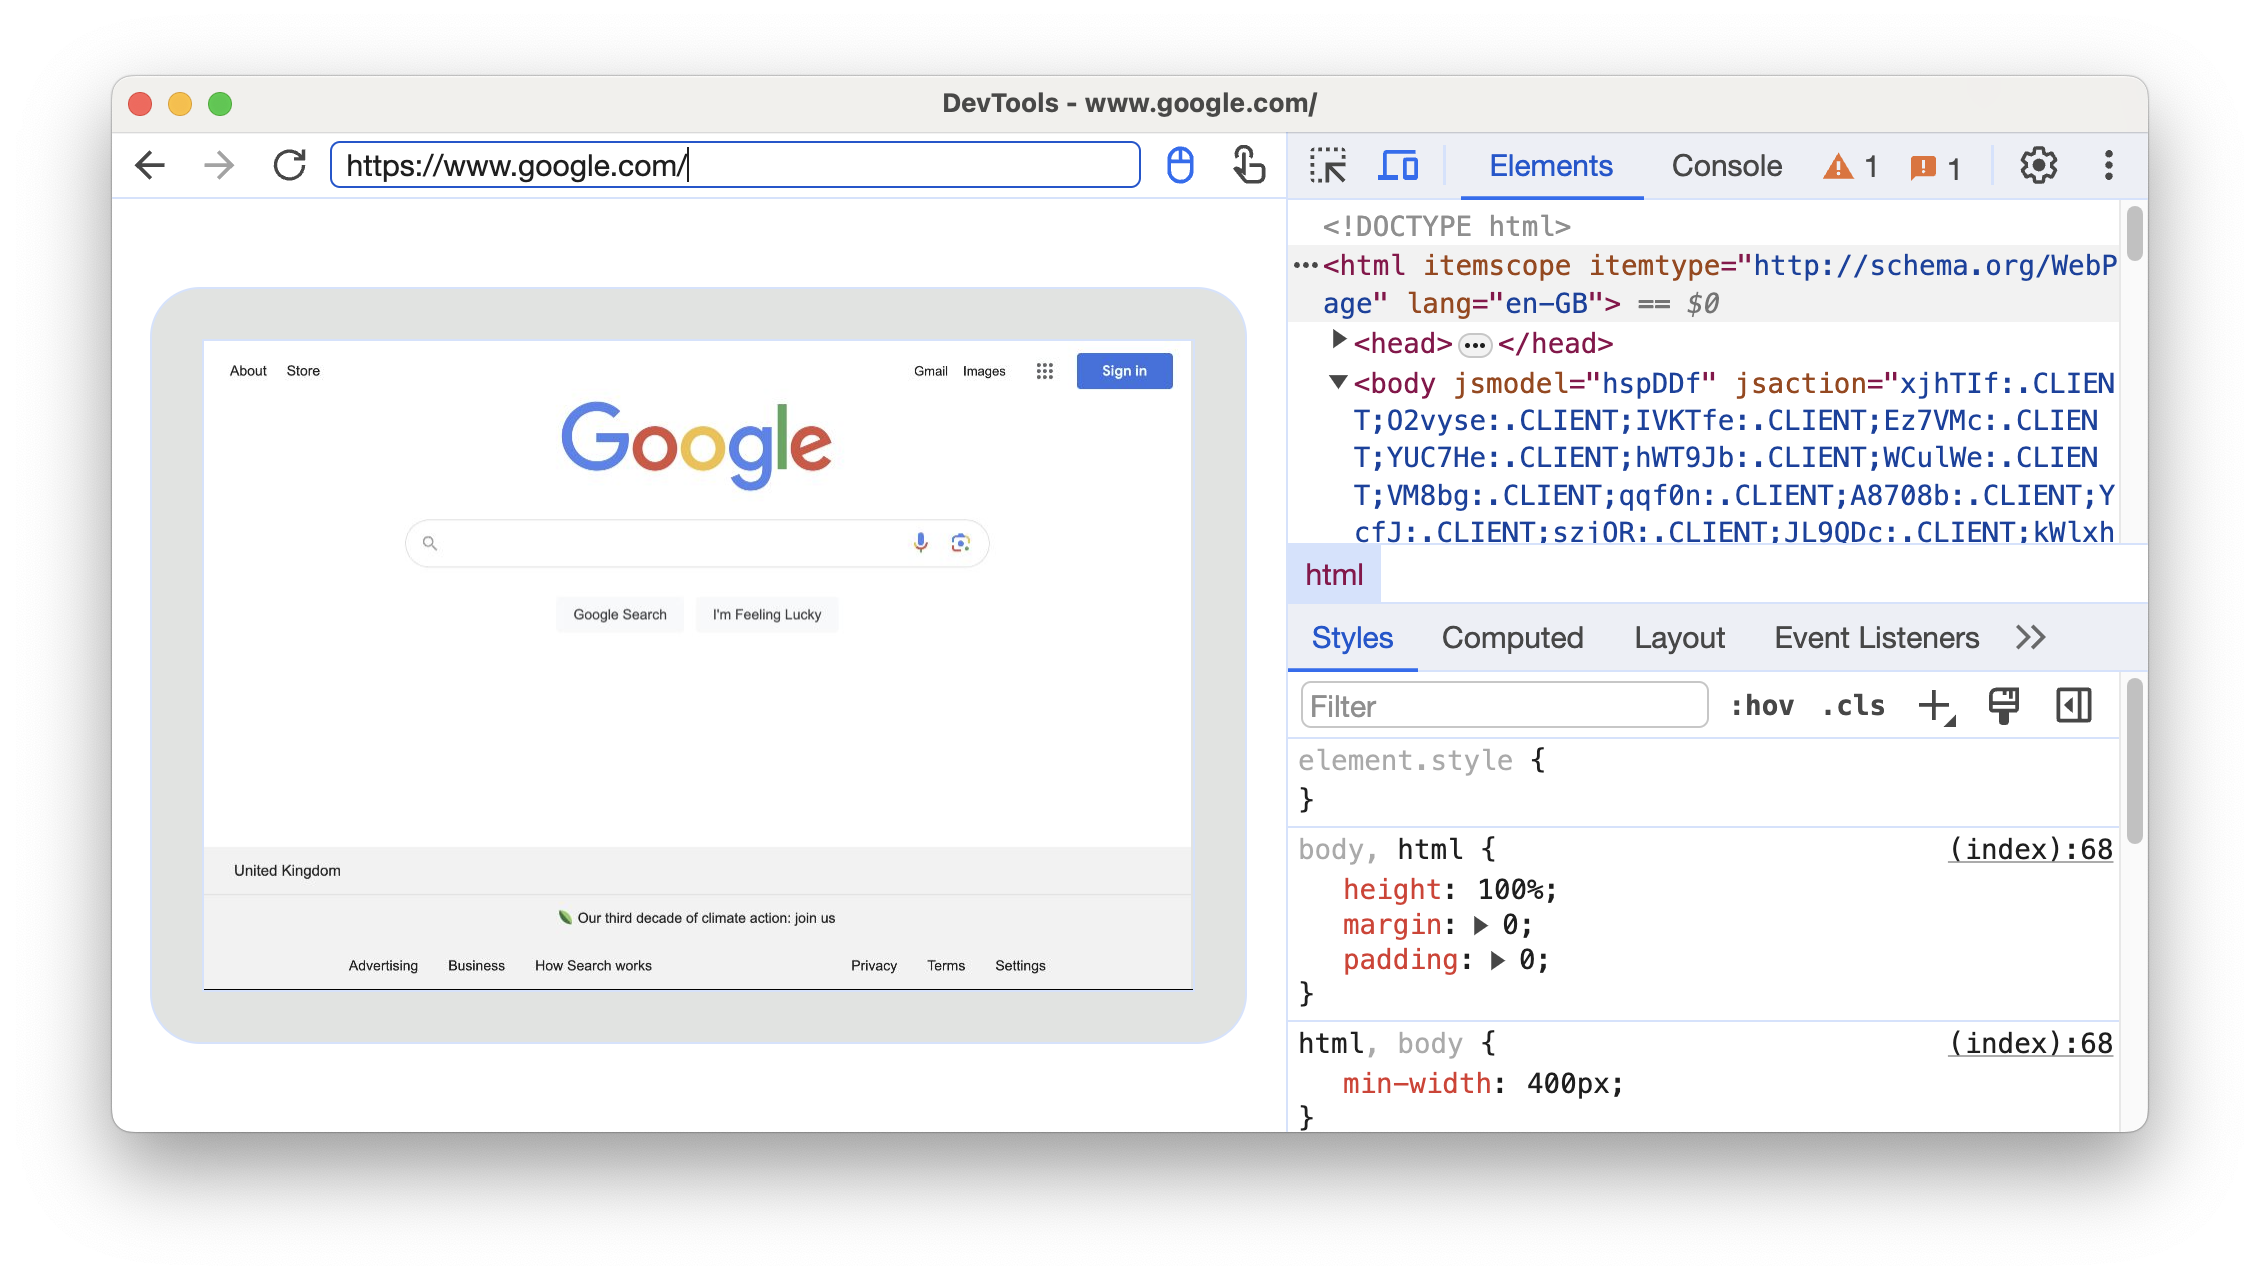
Next to the address bar, you can toggle input methods.
Case 2: Set up port forwarding through USB for your Android device
Set up remote debugging between your development machine and your Android device. When you're finished, you should see your Android device in the list.
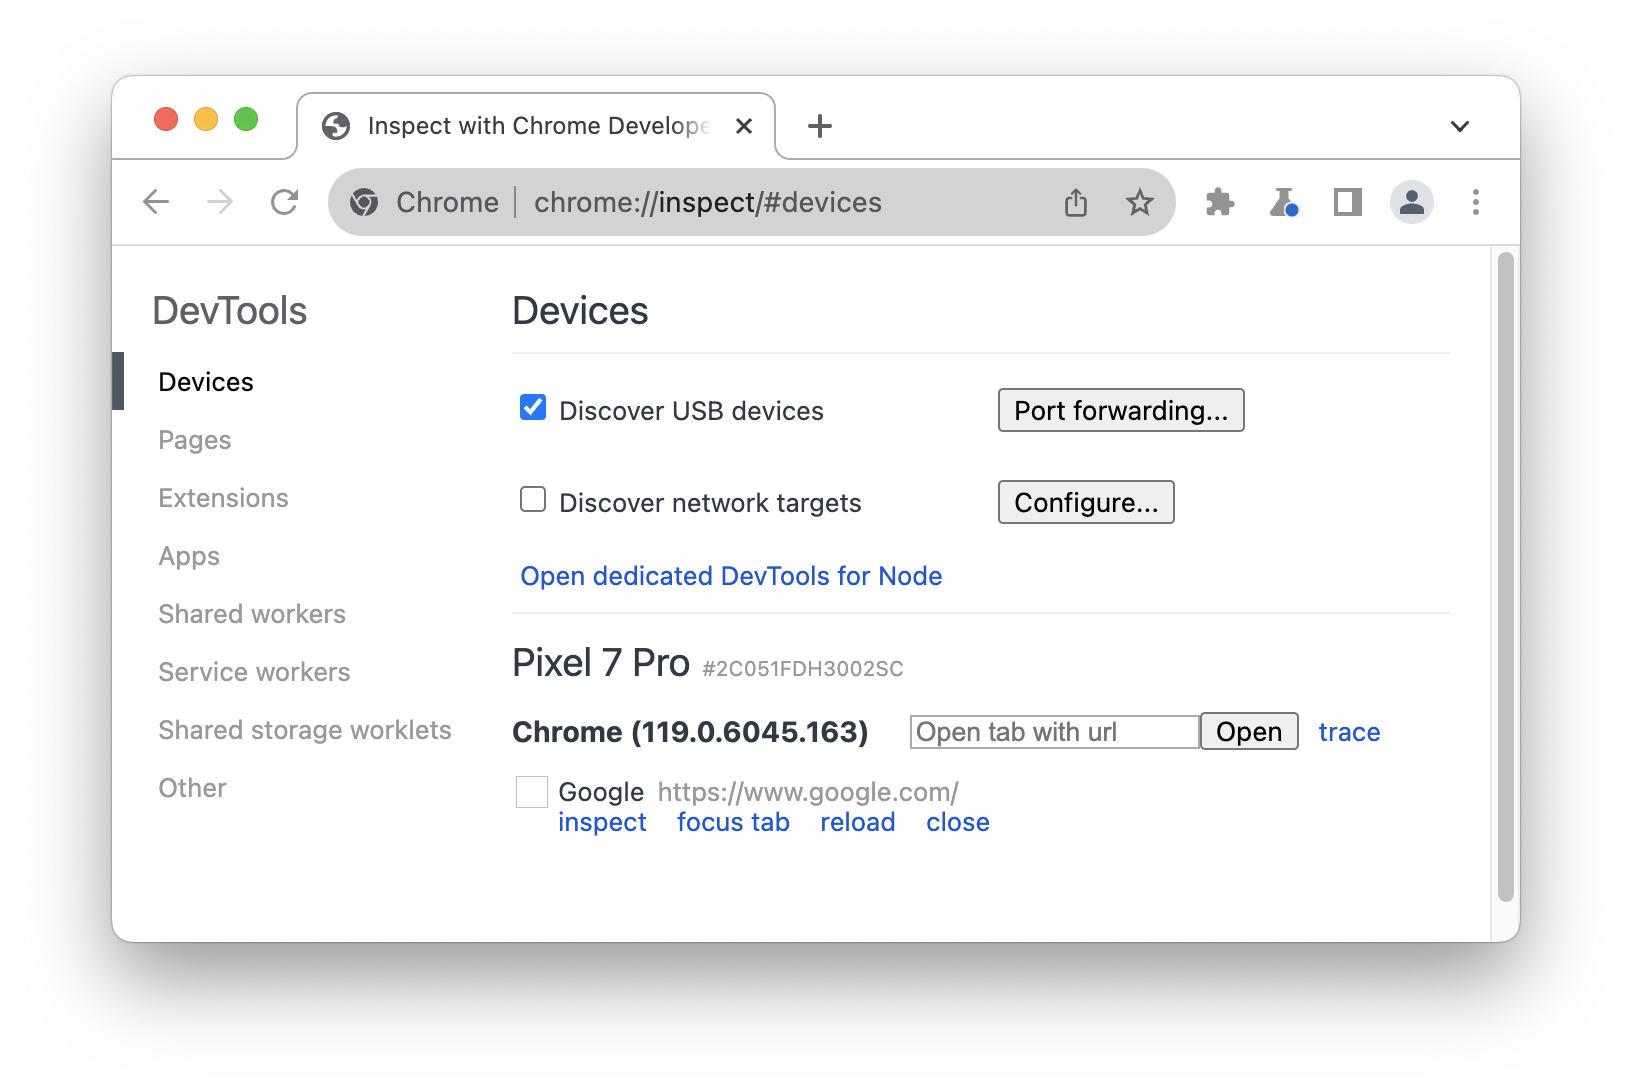
Make sure
Discover USB devices is checked.
Click Port forwarding next to the checkbox.
In Port forwarding settings,
localhost:8080is set up by default. Check Enable port forwarding.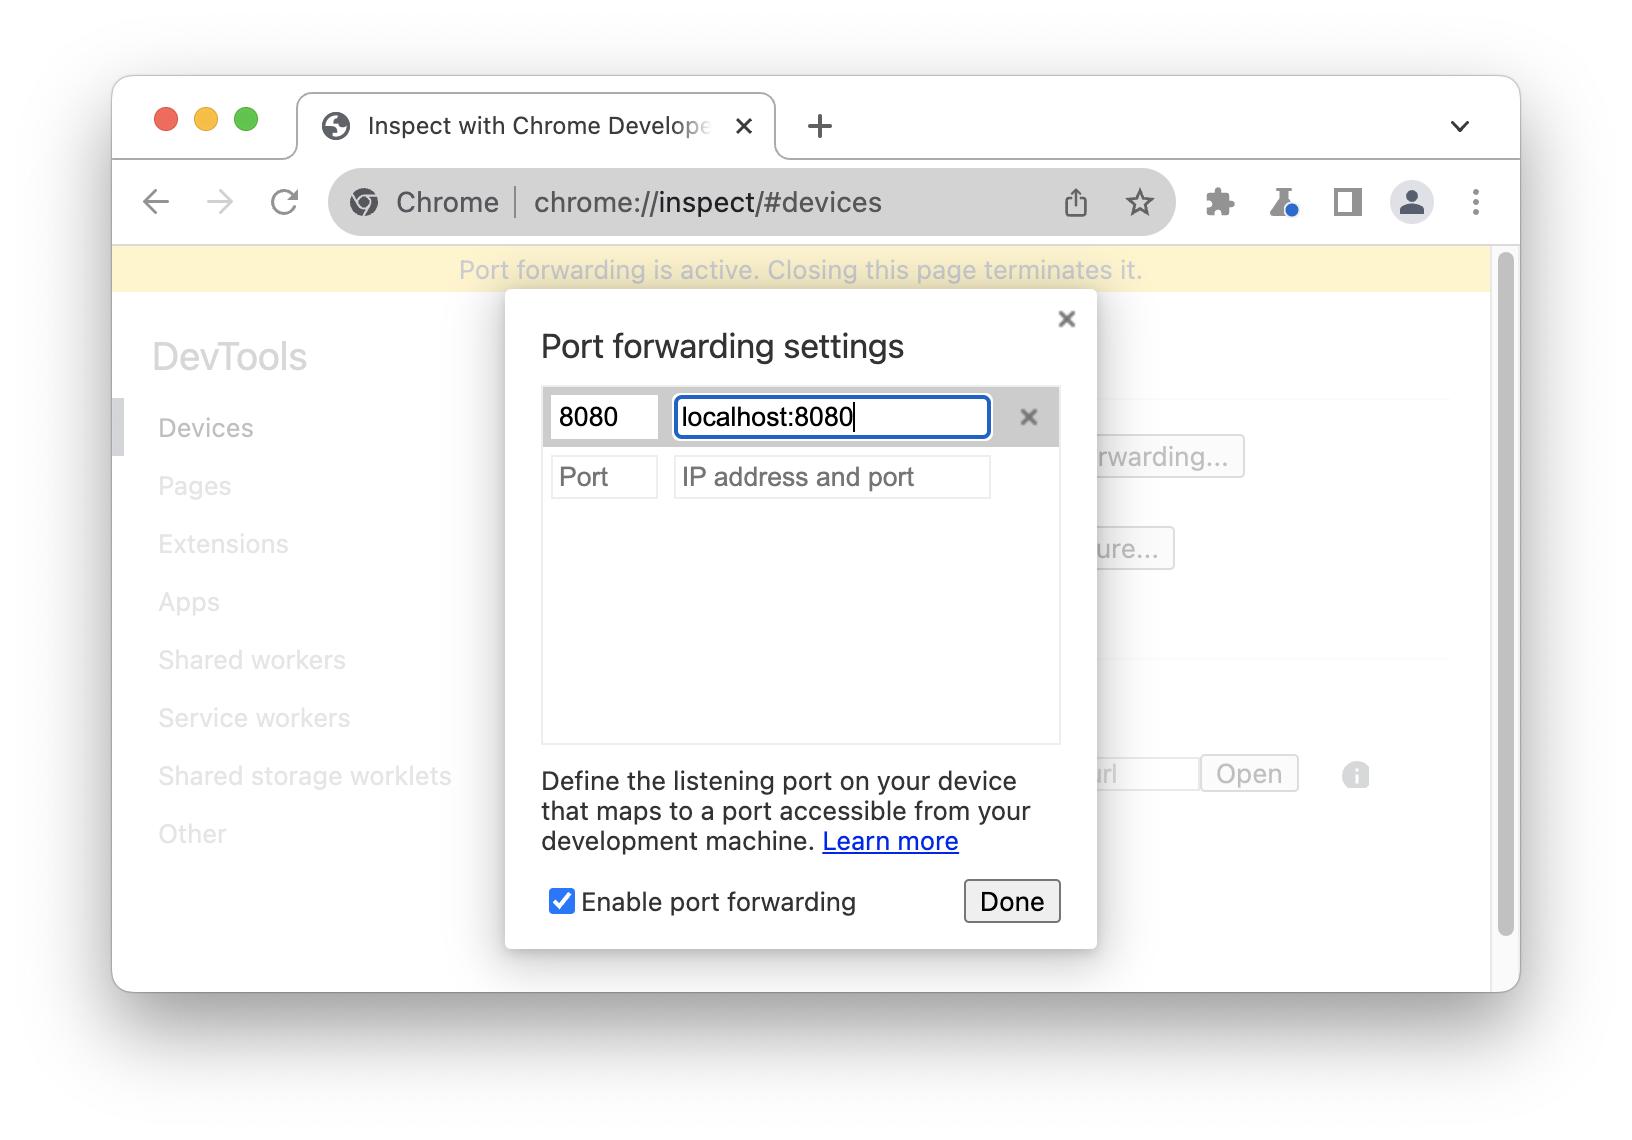 .
.If you want to set up other ports, follow the next to steps. Otherwise skip the steps and click Done.
In the Port textfield on the left, enter the port number from which you want to be able to access the site on your Android device. For example, if you wanted to access the site from
localhost:5000you would enter5000.In the IP address and port textfield on the right, enter the IP address or hostname on which your site is running on your development machine's web server, followed by the port number. For example, if your site is running on
localhost:5000you would enterlocalhost:5000.Click Done.
Port forwarding is now set up. You can see a status indicator of the port forward at the top as well as besides the device name.
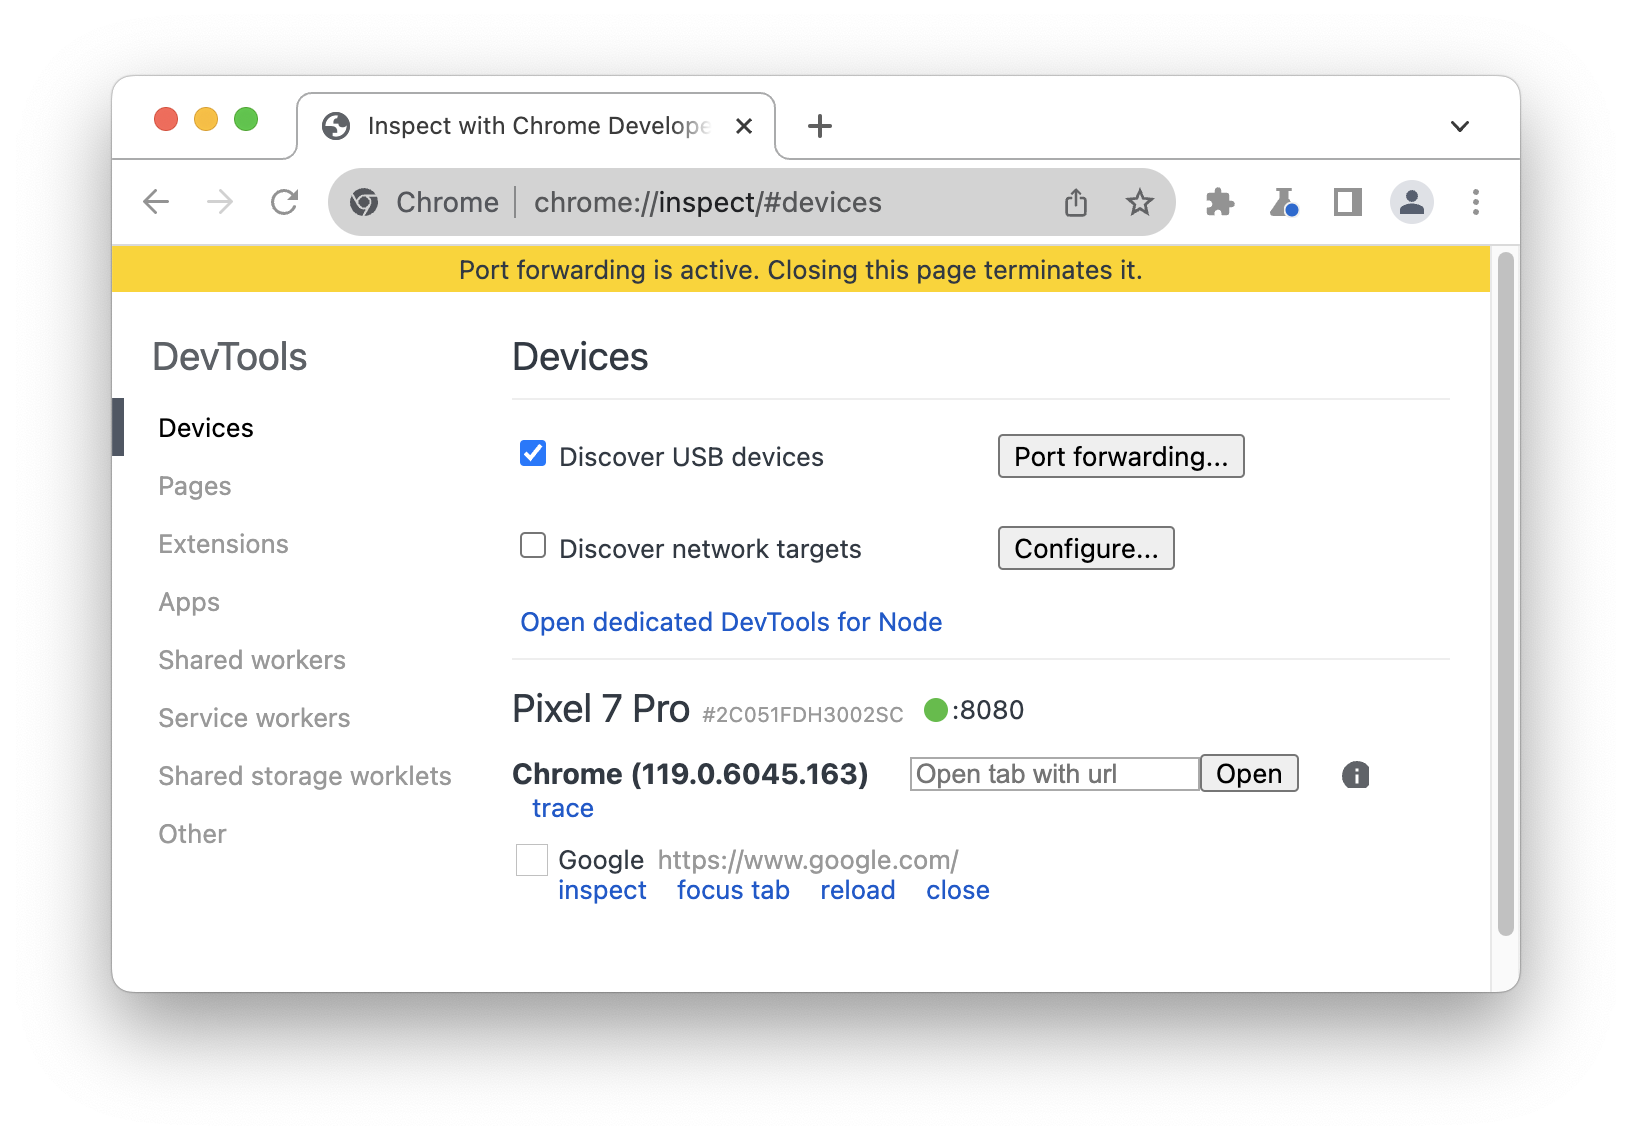
To view the content, open up Chrome on your Android device and go to the localhost port that you
specified in the Device port field. For example, if you entered 5000 in the field, then you
would go to localhost:5000.
Map to custom local domains
Custom domain mapping lets you to view content on an Android device from a web server on your development machine that is using a custom domain.
For example, suppose that your site uses a third-party JavaScript library that only works on the
allow-listed domain chrome.devtools. So, you create an entry in your hosts file on your
development machine to map this domain to localhost (i.e. 127.0.0.1 chrome.devtools). After
setting up custom domain mapping and port forwarding, you'll be able to view the site on your
Android device at the URL chrome.devtools.
Set up port forwarding to proxy server
To map a custom domain you must run a proxy server on your development machine. Examples of proxy servers are Charles, Squid, and Fiddler.
To set up port forwarding to a proxy:
Run the proxy server and note the port that it's using.
Set up port forwarding to your Android device. For the local address field, enter
localhost:followed by the port that your proxy server is running on. For example, if it's running on port8000, then you would enterlocalhost:8000. In the device port field enter the number that you want your Android device to listen on, such as3333.
Configure proxy settings on your device
Next, you need to configure your Android device to communicate with the proxy server.
- On your Android device go to Settings > Wi-Fi.
Long-press the name of the network that you are connected to.
Tap Modify network.
Tap Advanced options. The proxy settings display.
Tap the Proxy menu and select Manual.
For the Proxy hostname field, enter
localhost.For the Proxy port field, enter the port number that you entered for device port in the previous section.
Tap Save.
With these settings, your device forwards all of its requests to the proxy on your development machine. The proxy makes requests on behalf of your device, so requests to your customized local domain are properly resolved.
Now you can access custom domains on your Android device Android just as you would on the development machine.
If your web server is running off of a non-standard port, remember to specify the port when
requesting the content from your Android device. For example, if your web server is using the custom
domain chrome.devtools on port 7331, when you view the site from your Android device you should
be using the URL chrome.devtools:7331.


