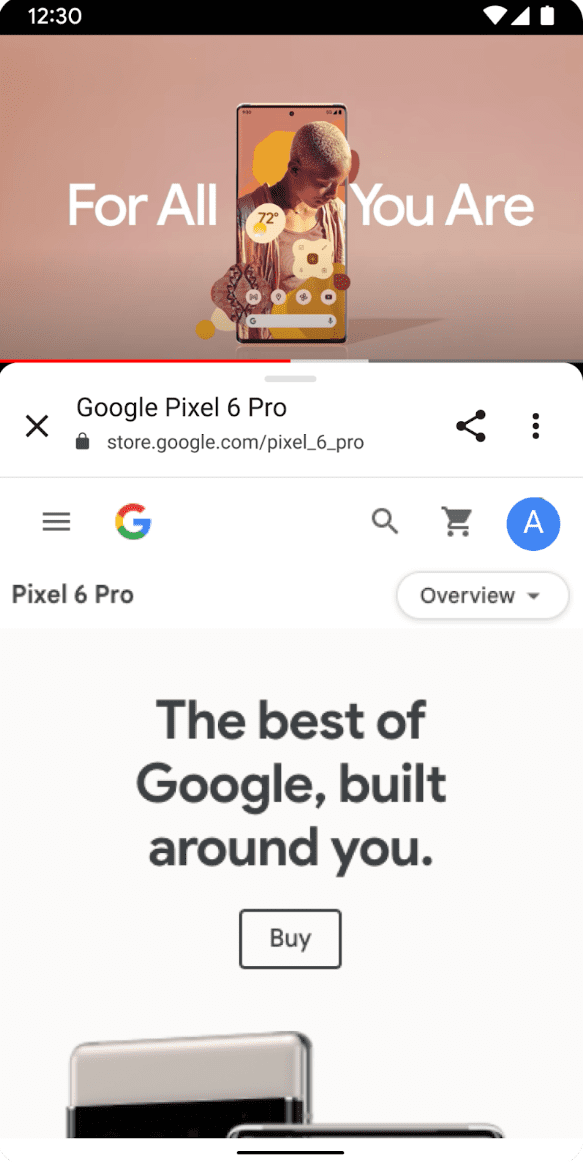
डिफ़ॉल्ट रूप से, कस्टम टैब पूरी विंडो वाली गतिविधि के तौर पर लॉन्च होते हैं. Chrome 107 से, पोर्ट्रेट मोड में लॉन्च करने के लिए, अपनी पसंद के टैब के कुछ हिस्से का इस्तेमाल किया जा सकता है. इससे उपयोगकर्ता, वेब कॉन्टेंट देखते समय आपके ऐप्लिकेशन से इंटरैक्ट करके, कई काम कर सकते हैं. उपयोगकर्ता, टूलबार के हैंडल को ऊपर की ओर खींचकर, कस्टम टैब को फ़ुल-स्क्रीन में बड़ा कर सकते हैं. साथ ही, हैंडल को नीचे की ओर खींचकर, टैब को लॉन्च करने के बाद उसकी मूल ऊंचाई पर वापस लाया जा सकता है.

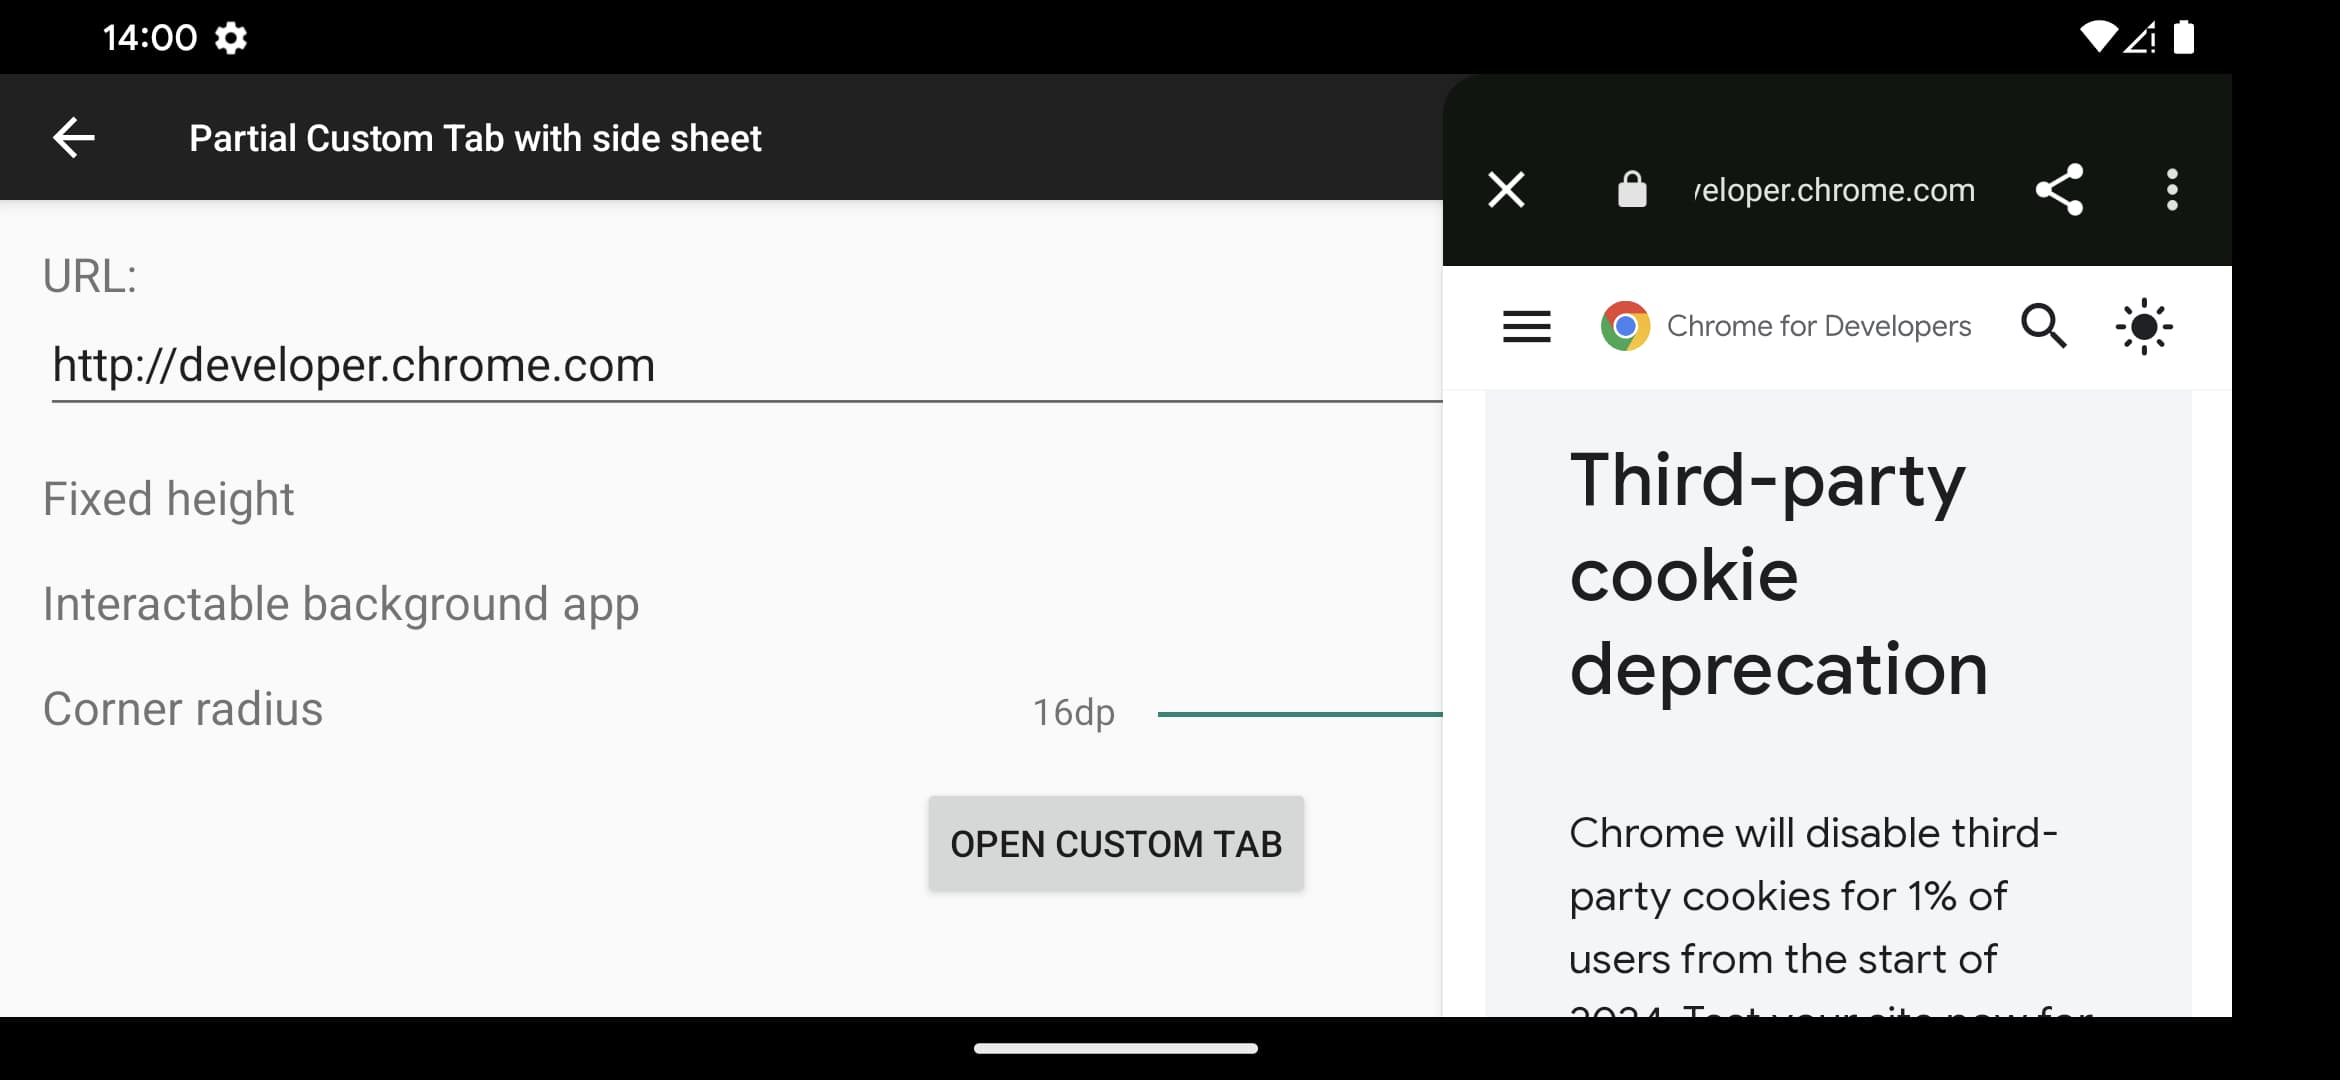
बड़ी स्क्रीन या लैंडस्केप मोड में काम करने वाले डिवाइसों के लिए, Chrome 120 से शुरू होने वाले वर्शन में, साइडशीट में कस्टम टैब का कुछ हिस्सा दिखाने के लिए, लॉन्च की ज़्यादा से ज़्यादा चौड़ाई तय की जा सकती है. ब्रेक पॉइंट सेट करके, यह तय किया जा सकता है कि किसी साइड या बॉटम शीट में, कस्टम टैब का कौनसा हिस्सा दिखाना है.

पूर्वापेक्षा
कुछ हिस्से के कस्टम टैब का इस्तेमाल करने के लिए, आपको ये काम करने होंगे:
CustomTabsServiceConnectionका इस्तेमाल करके नया ब्राउज़र सेशन शुरू करें और उसे कस्टम टैब इंटेंट को पास करें याstartActivityForResult()का इस्तेमाल करके, कस्टम टैब गतिविधि शुरू करें.
अगर आपको सेवा का कनेक्शन अभी तक सेट अप नहीं हुआ है, तो ऐप्लिकेशन को तुरंत चालू करने के लिए, दोनों तरीकों को एक साथ इस्तेमाल करें.
बॉटम शीट कॉन्फ़िगर करना
किसी कस्टम टैब को आंशिक कस्टम टैब में बदलने के लिए, CustomTabBuilder क्लास के setInitialActivityHeightPx() तरीके को कॉल करके, लॉन्च की शुरुआती ऊंचाई को पिक्सल में तय करें. डिफ़ॉल्ट रूप से, कस्टम टैब का कुछ हिस्सा छोटा या बड़ा किया जा सकता है. हालांकि, इस सुविधा को बंद करने के लिए, ACTIVITY\_HEIGHT\_FIXED को पास किया जा सकता है:
new CustomTabsBuilder().setInitialActivityHeightPx(
    400,
    ACTIVITY_HEIGHT_FIXED
);
साइड शीट कॉन्फ़िगर करना
साइड शीट के व्यवहार को कॉन्फ़िगर करने के लिए, CustomTabBuilder क्लास के setInitialActivityWidthPx() तरीके को कॉल करके, लॉन्च की शुरुआती चौड़ाई को पिक्सल में तय करें.
डिफ़ॉल्ट रूप से, कस्टम टैब का कुछ हिस्सा छोटा या बड़ा किया जा सकता है. हालांकि, इस सुविधा को बंद करने के लिए, ACTIVITY\_HEIGHT\_FIXED को पास किया जा सकता है:
  CustomTabsIntent.Builder intentBuilder = new CustomTabsIntent.Builder(session)
        .setInitialActivityHeightPx(400)
        .setInitialActivityWidthPx(400);
        .setActivitySideSheetBreakpointDp(800);
अगर स्क्रीन की चौड़ाई, setActivitySideSheetBreakpointDp() से सेट की गई ब्रेकपॉइंट वैल्यू से ज़्यादा है, तो कस्टम टैब साइड शीट के तौर पर काम करेगा. अगर स्क्रीन की चौड़ाई x से ज़्यादा है, तो कस्टम टैब साइड शीट के तौर पर काम करेगा. ऐसा न होने पर, यह बॉटम शीट के तौर पर काम करेगा. अगर कोई ब्रेकपॉइंट तय नहीं किया गया है, तो ब्राउज़र लागू करने की सुविधा को डिफ़ॉल्ट वैल्यू 840dp के तौर पर सेट किया जाना चाहिए.
अगर x को <600dp पर सेट किया गया है, तो ब्राउज़र को लागू करने पर इसे डिफ़ॉल्ट रूप से 600dp पर सेट किया जाना चाहिए.
किसी मौजूदा सेशन के साथ, कस्टम टैब का कुछ हिस्सा लॉन्च करना
CustomTabsSession customTabsSession;

// ...

CustomTabsIntent customTabsIntent = new CustomTabsIntent.Builder(customTabsSession)
   .setInitialActivityHeightPx(500)
    .setInitialActivityWidthPx(400);
    .setActivitySideSheetBreakpointDp(800);
   .setCloseButtonPosition(CustomTabsIntent.CLOSE_BUTTON_POSITION_END)
   // ...
   .build();

customTabsIntent.launchUrl(context, Uri.parse(url))
startActivityForResult का इस्तेमाल करके, कस्टम टैब का कुछ हिस्सा लॉन्च करना
private ActivityResultLauncher<String> mCustomTabLauncher = registerForActivityResult(new ActivityResultContract<String, Integer>() {
    @Override
    public Integer parseResult(int statusCode, @Nullable Intent intent) {
        return statusCode;
    }

    @NonNull
    @Override
    public Intent createIntent(@NonNull Context context, String url) {
        CustomTabsIntent.Builder builder = new CustomTabsIntent.Builder(customTabsSession)
                .setInitialActivityHeightPx(500)
                .setInitialActivityWidthPx(400);
                .setActivitySideSheetBreakpointDp(800);
                .setCloseButtonPosition(CustomTabsIntent.CLOSE_BUTTON_POSITION_END)
                .setToolbarCornerRadiusDp(10);
        Intent customTabsIntent = builder.build().intent;
        customTabsIntent.setData(Uri.parse(url));
        return customTabsIntent;
    }
}, new ActivityResultCallback<Integer>() {
    @Override
    public void onActivityResult(Integer statusCode) {
       // ...
    }
});

@Override
public void onCreate(@Nullable Bundle savedInstanceState) {
    Button selectButton = findViewById(R.id.select_button);
    selectButton.setOnClickListener(new OnClickListener() {
        @Override
        public void onClick(View view) {
            mCustomTabLauncher.launch(customTabsIntent.intent);
        }
    });
}
अगला लेख: अपने कस्टम टैब में उपयोगकर्ता ऐक्टिविटी को मेज़र करने का तरीका जानें.

