

Chrome 66 では、ウェブページが Presentation API を介して接続されたセカンダリ ディスプレイを使用し、Presentation Receiver API を介してそのコンテンツを制御できるようになりました。
背景
これまで、ウェブ デベロッパーは、ユーザーが Chrome でローカル コンテンツを表示し、そのコンテンツをローカルで制御できるエクスペリエンスを構築できました。このコンテンツは、リモート ディスプレイに表示されるコンテンツとは異なるものでした。たとえば、テレビで動画を再生しながら youtube.com で再生キューを管理したり、ハングアウト セッションで全画面プレゼンテーションを表示しながら、ノートパソコンでスピーカーのメモを含むスライド リールを表示したりできます。
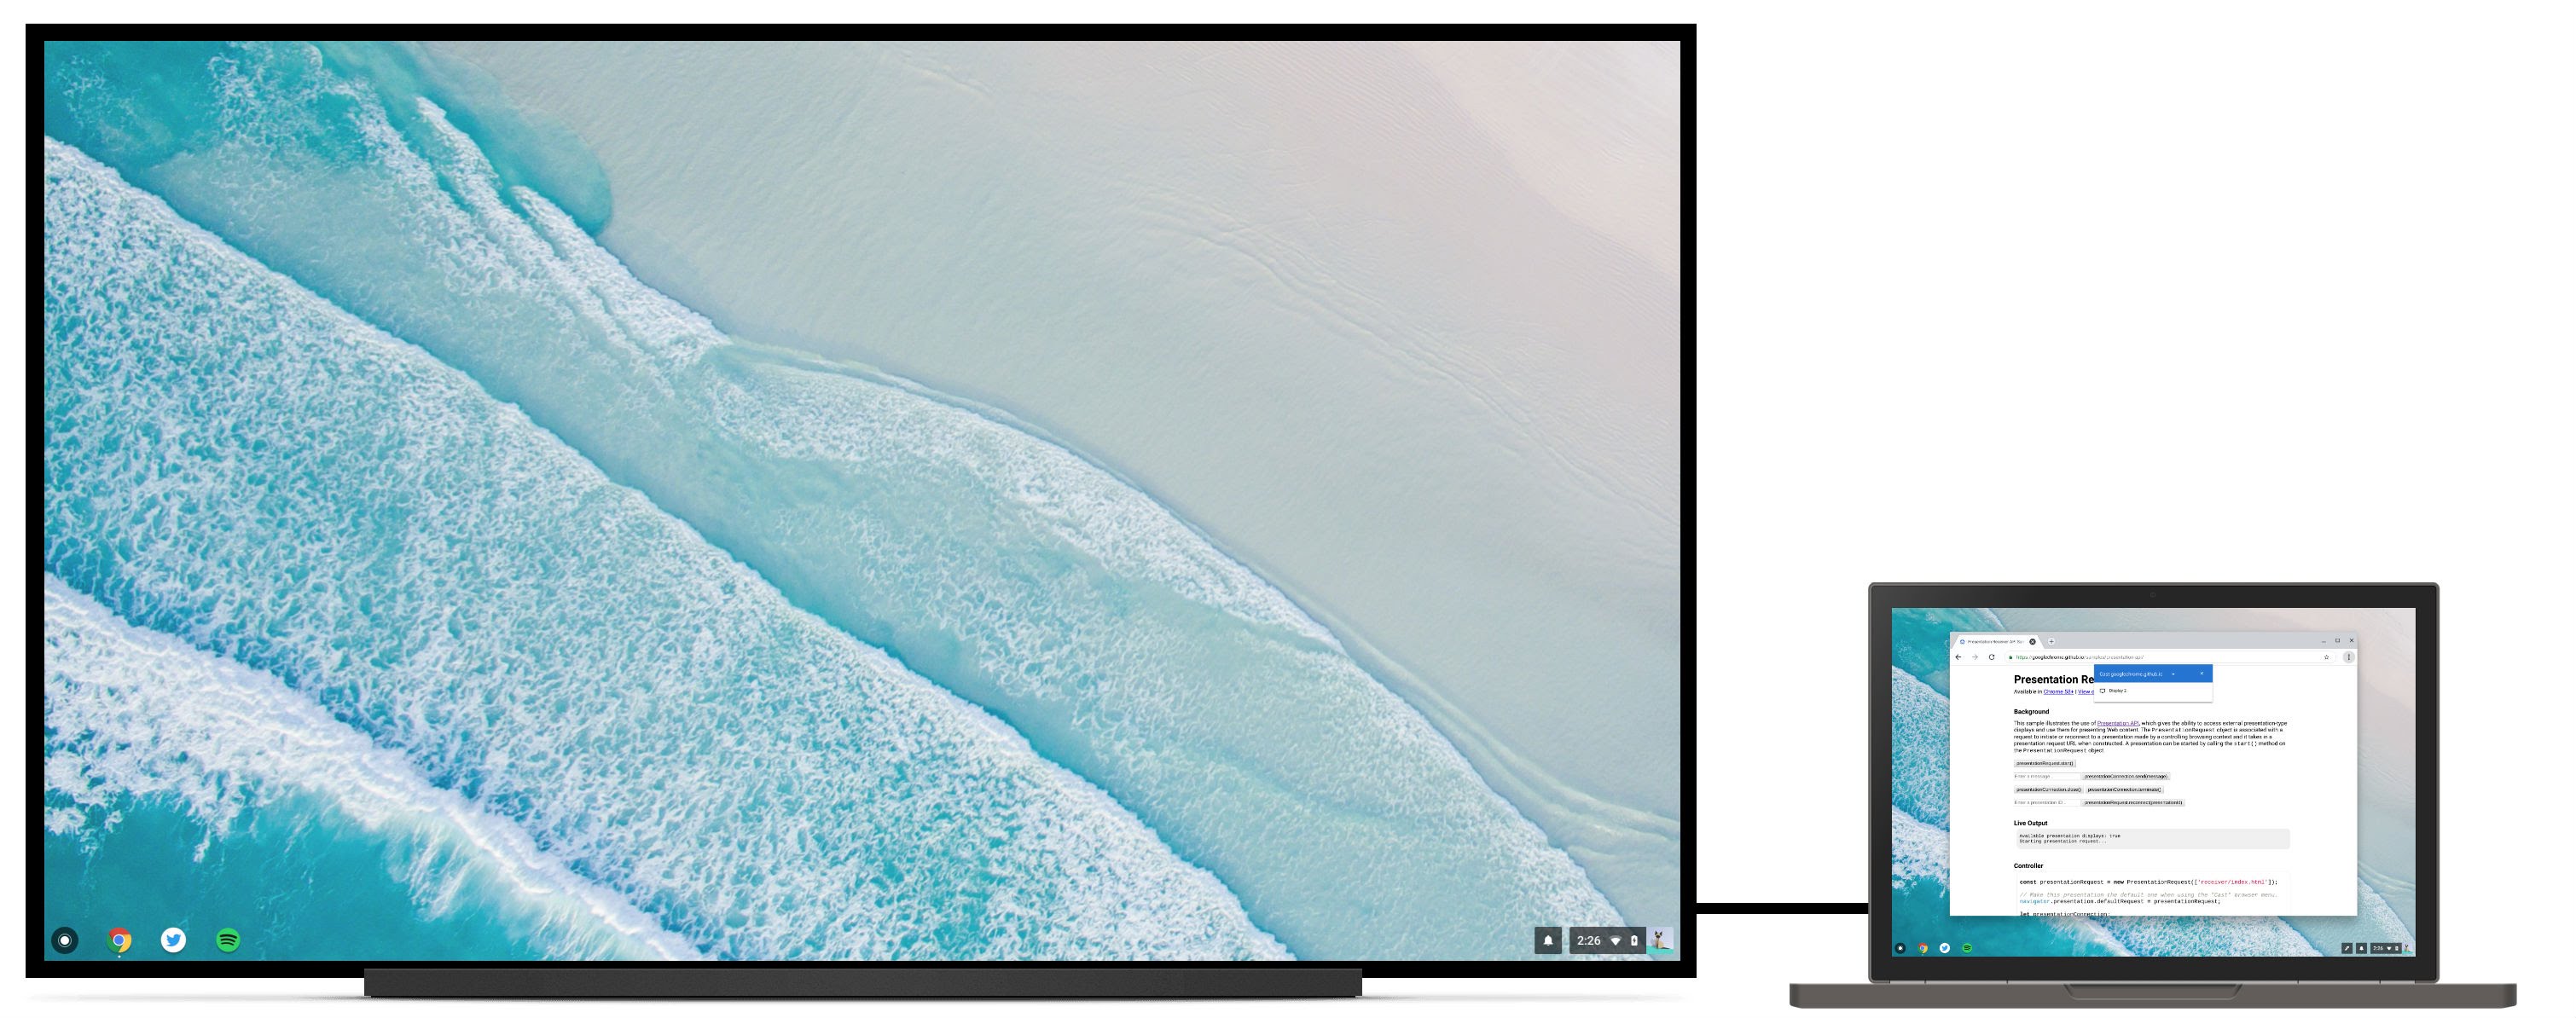
ただし、ユーザーが 2 つ目の接続されたディスプレイにコンテンツを表示したい場合もあります。たとえば、HDMI ケーブルで接続されたプロジェクタが設置された会議室にいるユーザーについて考えてみましょう。プレゼンテーションをリモート エンドポイントにミラーリングするのではなく、プロジェクタでスライドを全画面表示したい場合、ノートパソコンの画面はスピーカーのメモやスライドの操作に使用できます。サイト作成者は、非常に初歩的な方法(新しいウィンドウをポップアップし、ユーザーがセカンダリ ディスプレイに手動でドラッグして全画面表示に最大化させるなど)でこれをサポートできますが、これは手間がかかり、ローカル プレゼンテーションとリモート プレゼンテーションでエクスペリエンスが不一致になります。
ページを表示する
Presentation API を使用して、接続されたセカンダリ ディスプレイにウェブページを表示する方法について説明します。最終的な結果は https://googlechrome.github.io/samples/presentation-api/ で確認できます。
まず、セカンダリに接続されたディスプレイに表示する URL を含む新しい PresentationRequest オブジェクトを作成します。
const presentationRequest = new PresentationRequest('receiver.html');

In this article, I won’t cover use cases where the parameter passed to
`PresentationRequest` can be an array like `['cast://foo’, 'apple://foo',
'https://example.com']` as this is not relevant there.

We can now monitor presentation display availability and toggle a "Present"
button visibility based on presentation displays availability. Note that we can
also decide to always show this button.

<aside class="caution"><b>Caution:</b> The browser may use more energy while the <code>availability</code> object is alive
and actively listening for presentation display availability changes. Please
use it with caution in order to save energy on mobile.</aside>

```js
presentationRequest.getAvailability()
  .then(availability => {
    console.log('Available presentation displays: ' + availability.value);
    availability.addEventListener('change', function() {
      console.log('> Available presentation displays: ' + availability.value);
    });
  })
  .catch(error => {
    console.log('Presentation availability not supported, ' + error.name + ': ' +
        error.message);
  });
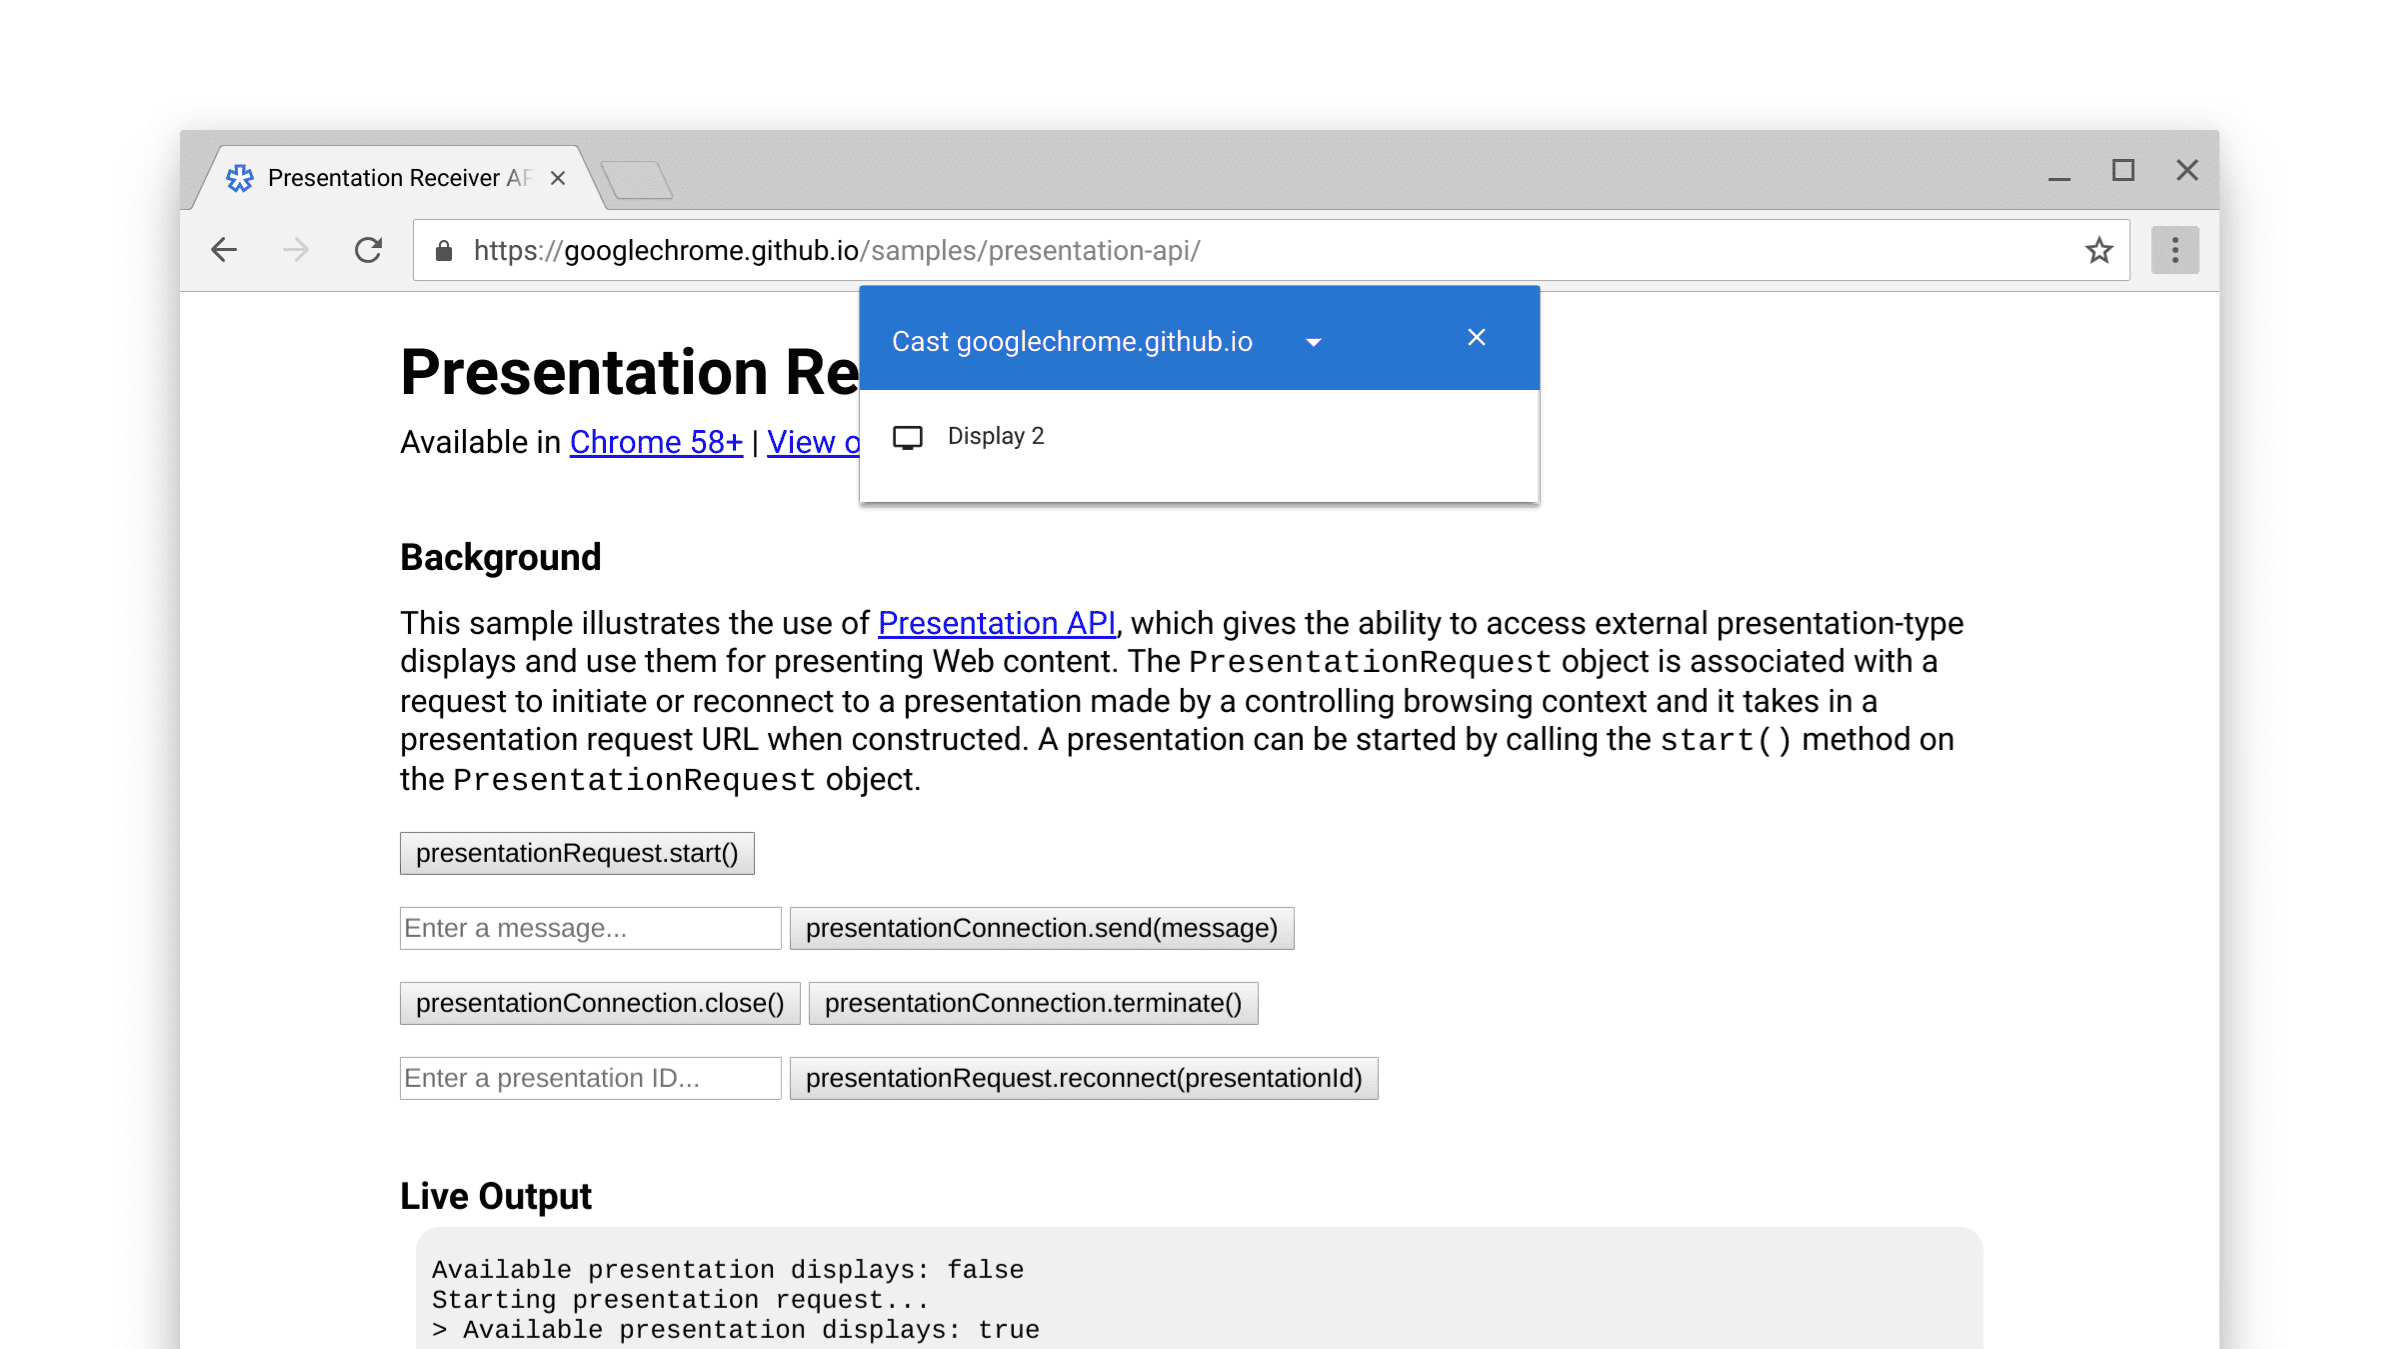
プレゼンテーション表示プロンプトを表示するには、ボタンのクリックなどのユーザー操作が必要です。ボタンのクリック時に presentationRequest.start() を呼び出し、ユーザーがプレゼンテーション ディスプレイ(このユースケースではセカンダリ ディスプレイ)を選択したら Promise が解決するのを待ちます。
function onPresentButtonClick() {
  presentationRequest.start()
  .then(connection => {
    console.log('Connected to ' + connection.url + ', id: ' + connection.id);
  })
  .catch(error => {
    console.log(error);
  });
}
ユーザーに表示されるリストには、Chromecast デバイスなどのリモート エンドポイントも含まれる場合があります(これらのデバイスをアドバタイズするネットワークに接続している場合)。ミラーリングされたディスプレイはリストに表示されません。http://crbug.com/840466 をご覧ください。
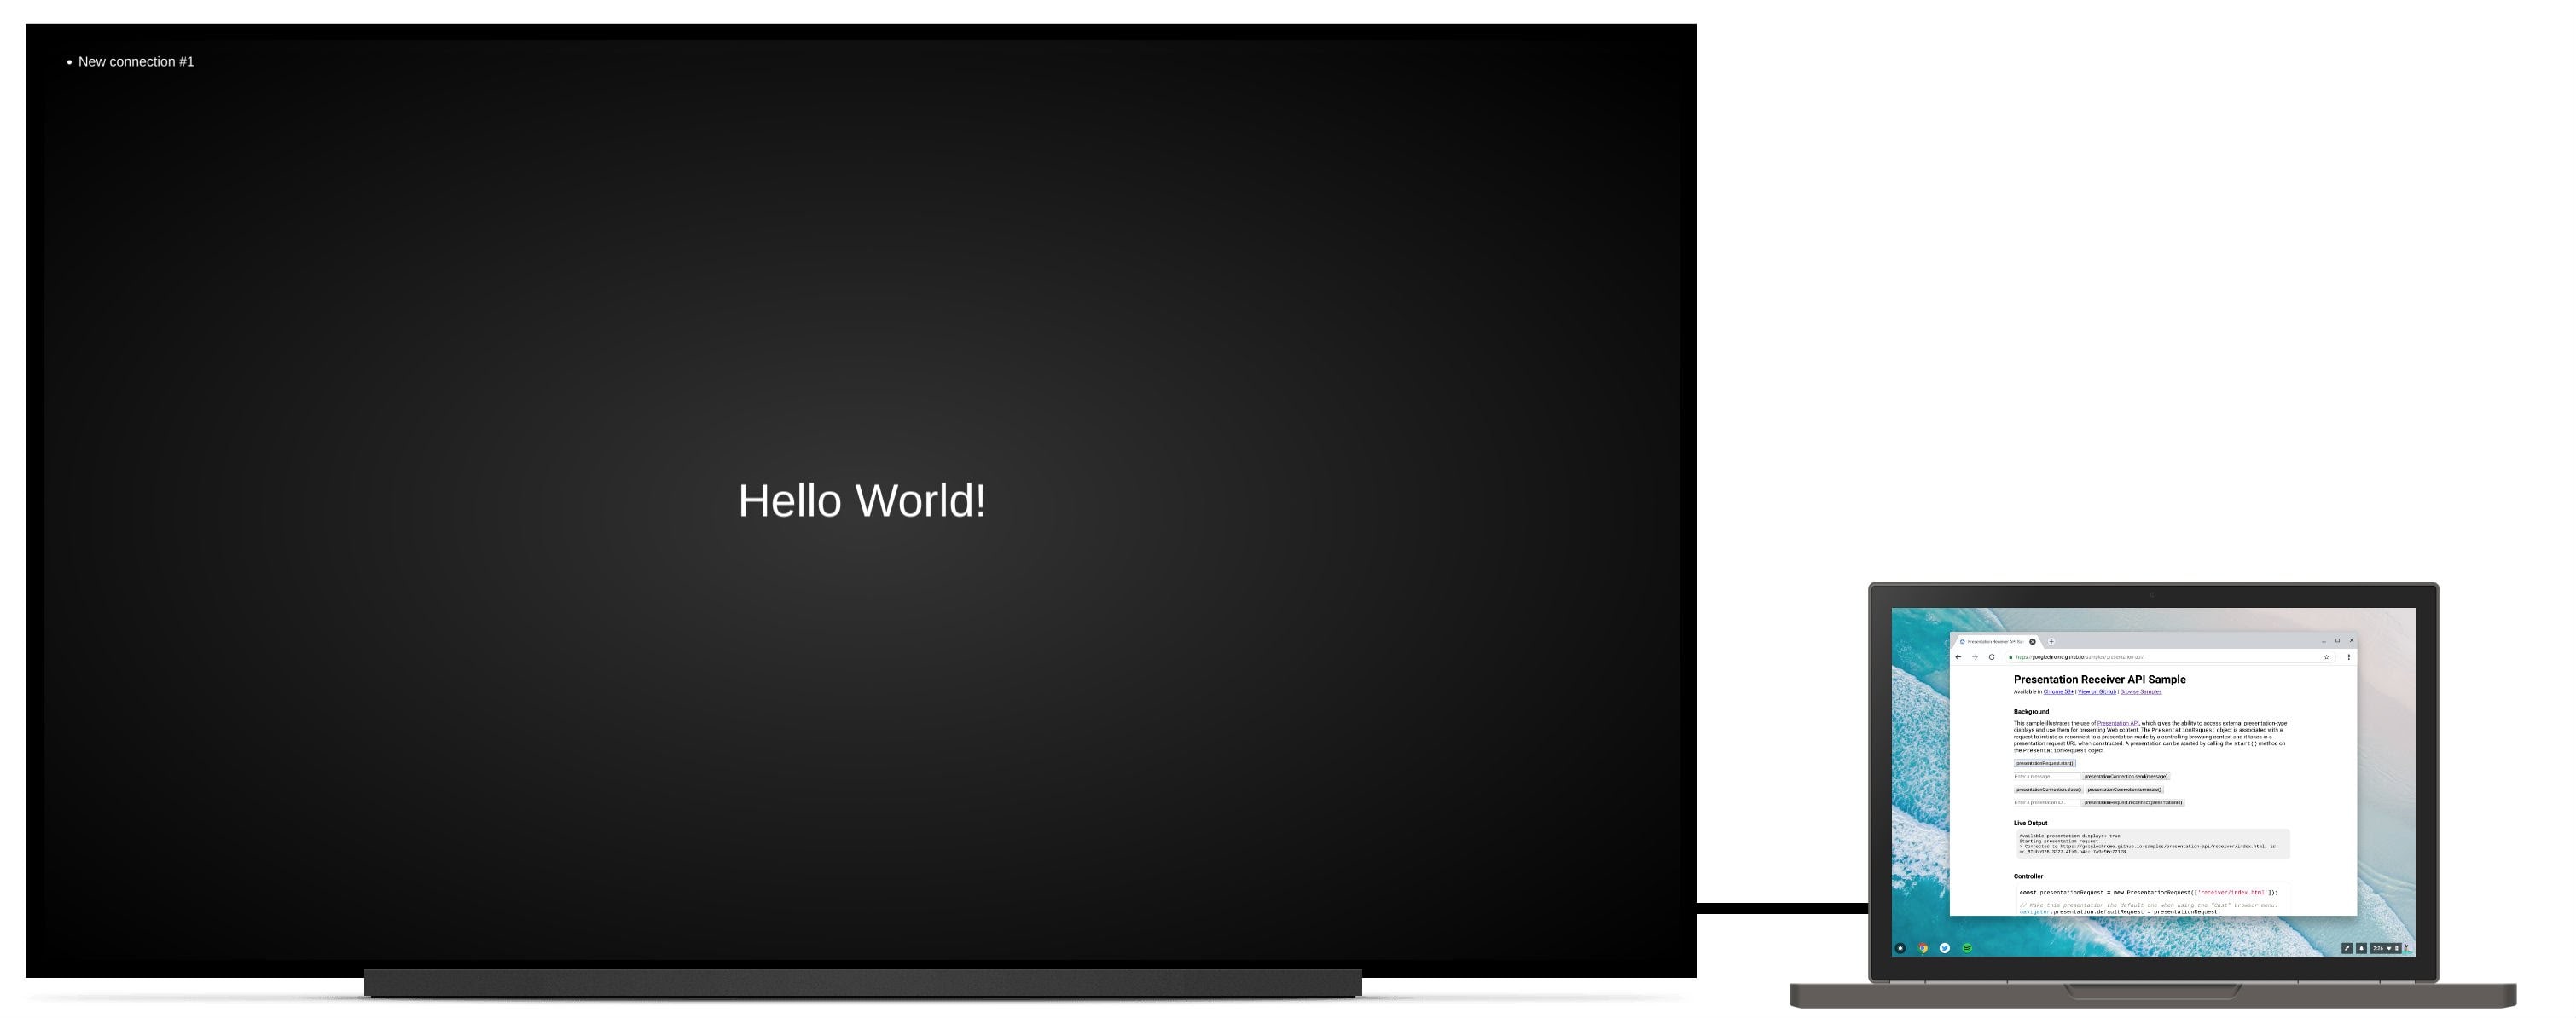
プロミスが解決すると、PresentationRequest オブジェクトの URL のウェブページが選択したディスプレイに表示されます。Et voilà!
さらに、次に示すように「close」イベントと「terminate」イベントをモニタリングできます。presentationRequest.reconnect(presentationId) を使用して「閉じられた」presentationConnection に再接続できます。ここで、presentationId は前の presentationRequest オブジェクトの ID です。
function onCloseButtonClick() {
  // Disconnect presentation connection but will allow reconnection.
  presentationConnection.close();
}

presentationConnection.addEventListener('close', function() {
  console.log('Connection closed.');
});


function onTerminateButtonClick() {
  // Stop presentation connection for good.
  presentationConnection.terminate();
}

presentationConnection.addEventListener('terminate', function() {
  console.log('Connection terminated.');
});
ページと通信する
ここまでは順調ですが、コントローラ ページ(先ほど作成したページ)とレシーバ ページ(PresentationRequest オブジェクトに渡したページ)の間でメッセージを渡すにはどうすればよいでしょうか?
まず、navigator.presentation.receiver.connectionList を使用してレシーバ ページの既存の接続を取得し、以下に示すように受信接続をリッスンします。
// Receiver page

navigator.presentation.receiver.connectionList
.then(list => {
  list.connections.map(connection => addConnection(connection));
  list.addEventListener('connectionavailable', function(event) {
    addConnection(event.connection);
  });
});

function addConnection(connection) {

  connection.addEventListener('message', function(event) {
    console.log('Message: ' + event.data);
    connection.send('Hey controller! I just received a message.');
  });

  connection.addEventListener('close', function(event) {
    console.log('Connection closed!', event.reason);
  });
}
メッセージを受信した接続は、リッスンできる「message」イベントを発生させます。メッセージは、文字列、Blob、ArrayBuffer、ArrayBufferView のいずれかです。送信は、コントローラ ページまたはレシーバ ページから connection.send(message) を呼び出すだけです。
// Controller page

function onSendMessageButtonClick() {
  presentationConnection.send('Hello!');
}

presentationConnection.addEventListener('message', function(event) {
  console.log('I just received ' + event.data + ' from the receiver.');
});
https://googlechrome.github.io/samples/presentation-api/ でサンプルを試して、動作を確認してください。私と同じようにお楽しみいただけると幸いです。
サンプルとデモ
この記事で使用した公式の Chrome サンプルをご覧ください。
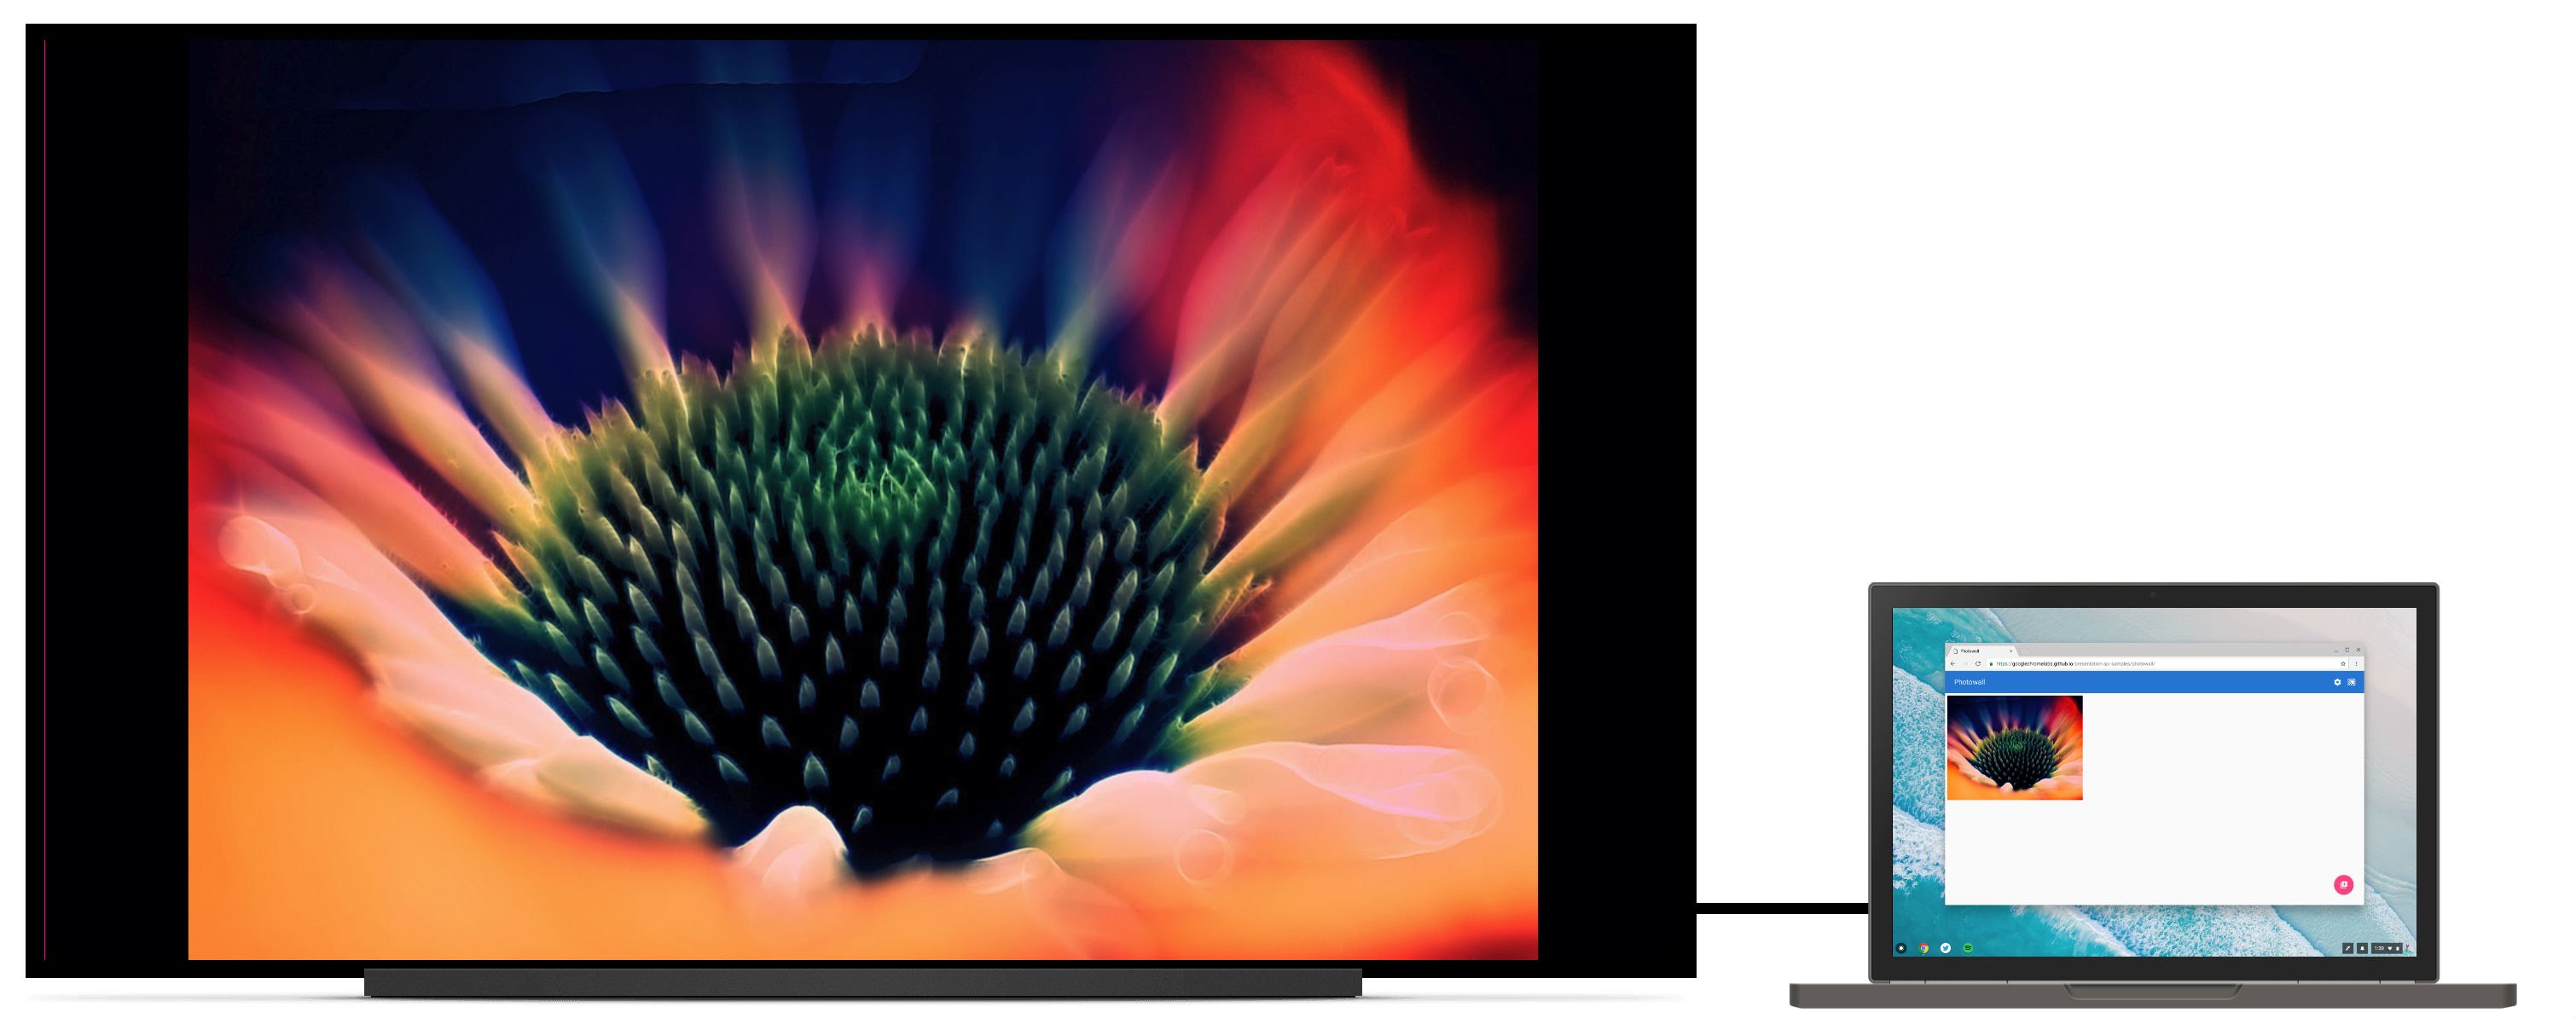
インタラクティブなフォトウォールのデモもおすすめです。このウェブアプリを使用すると、複数のコントローラでプレゼンテーション ディスプレイに写真のスライドショーを共同で表示できます。コードは https://github.com/GoogleChromeLabs/presentation-api-samples で入手できます。
終わりに
Chrome には、ウェブサイトにアクセスしているときにいつでも呼び出せる [キャスト] ブラウザ メニューがあります。このメニューのデフォルトの表示を制御する場合は、navigator.presentation.defaultRequest を、前に作成したカスタム presentationRequest オブジェクトに割り当てます。
// Make this presentation the default one when using the "Cast" browser menu.
navigator.presentation.defaultRequest = presentationRequest;
デベロッパー向けのヒント
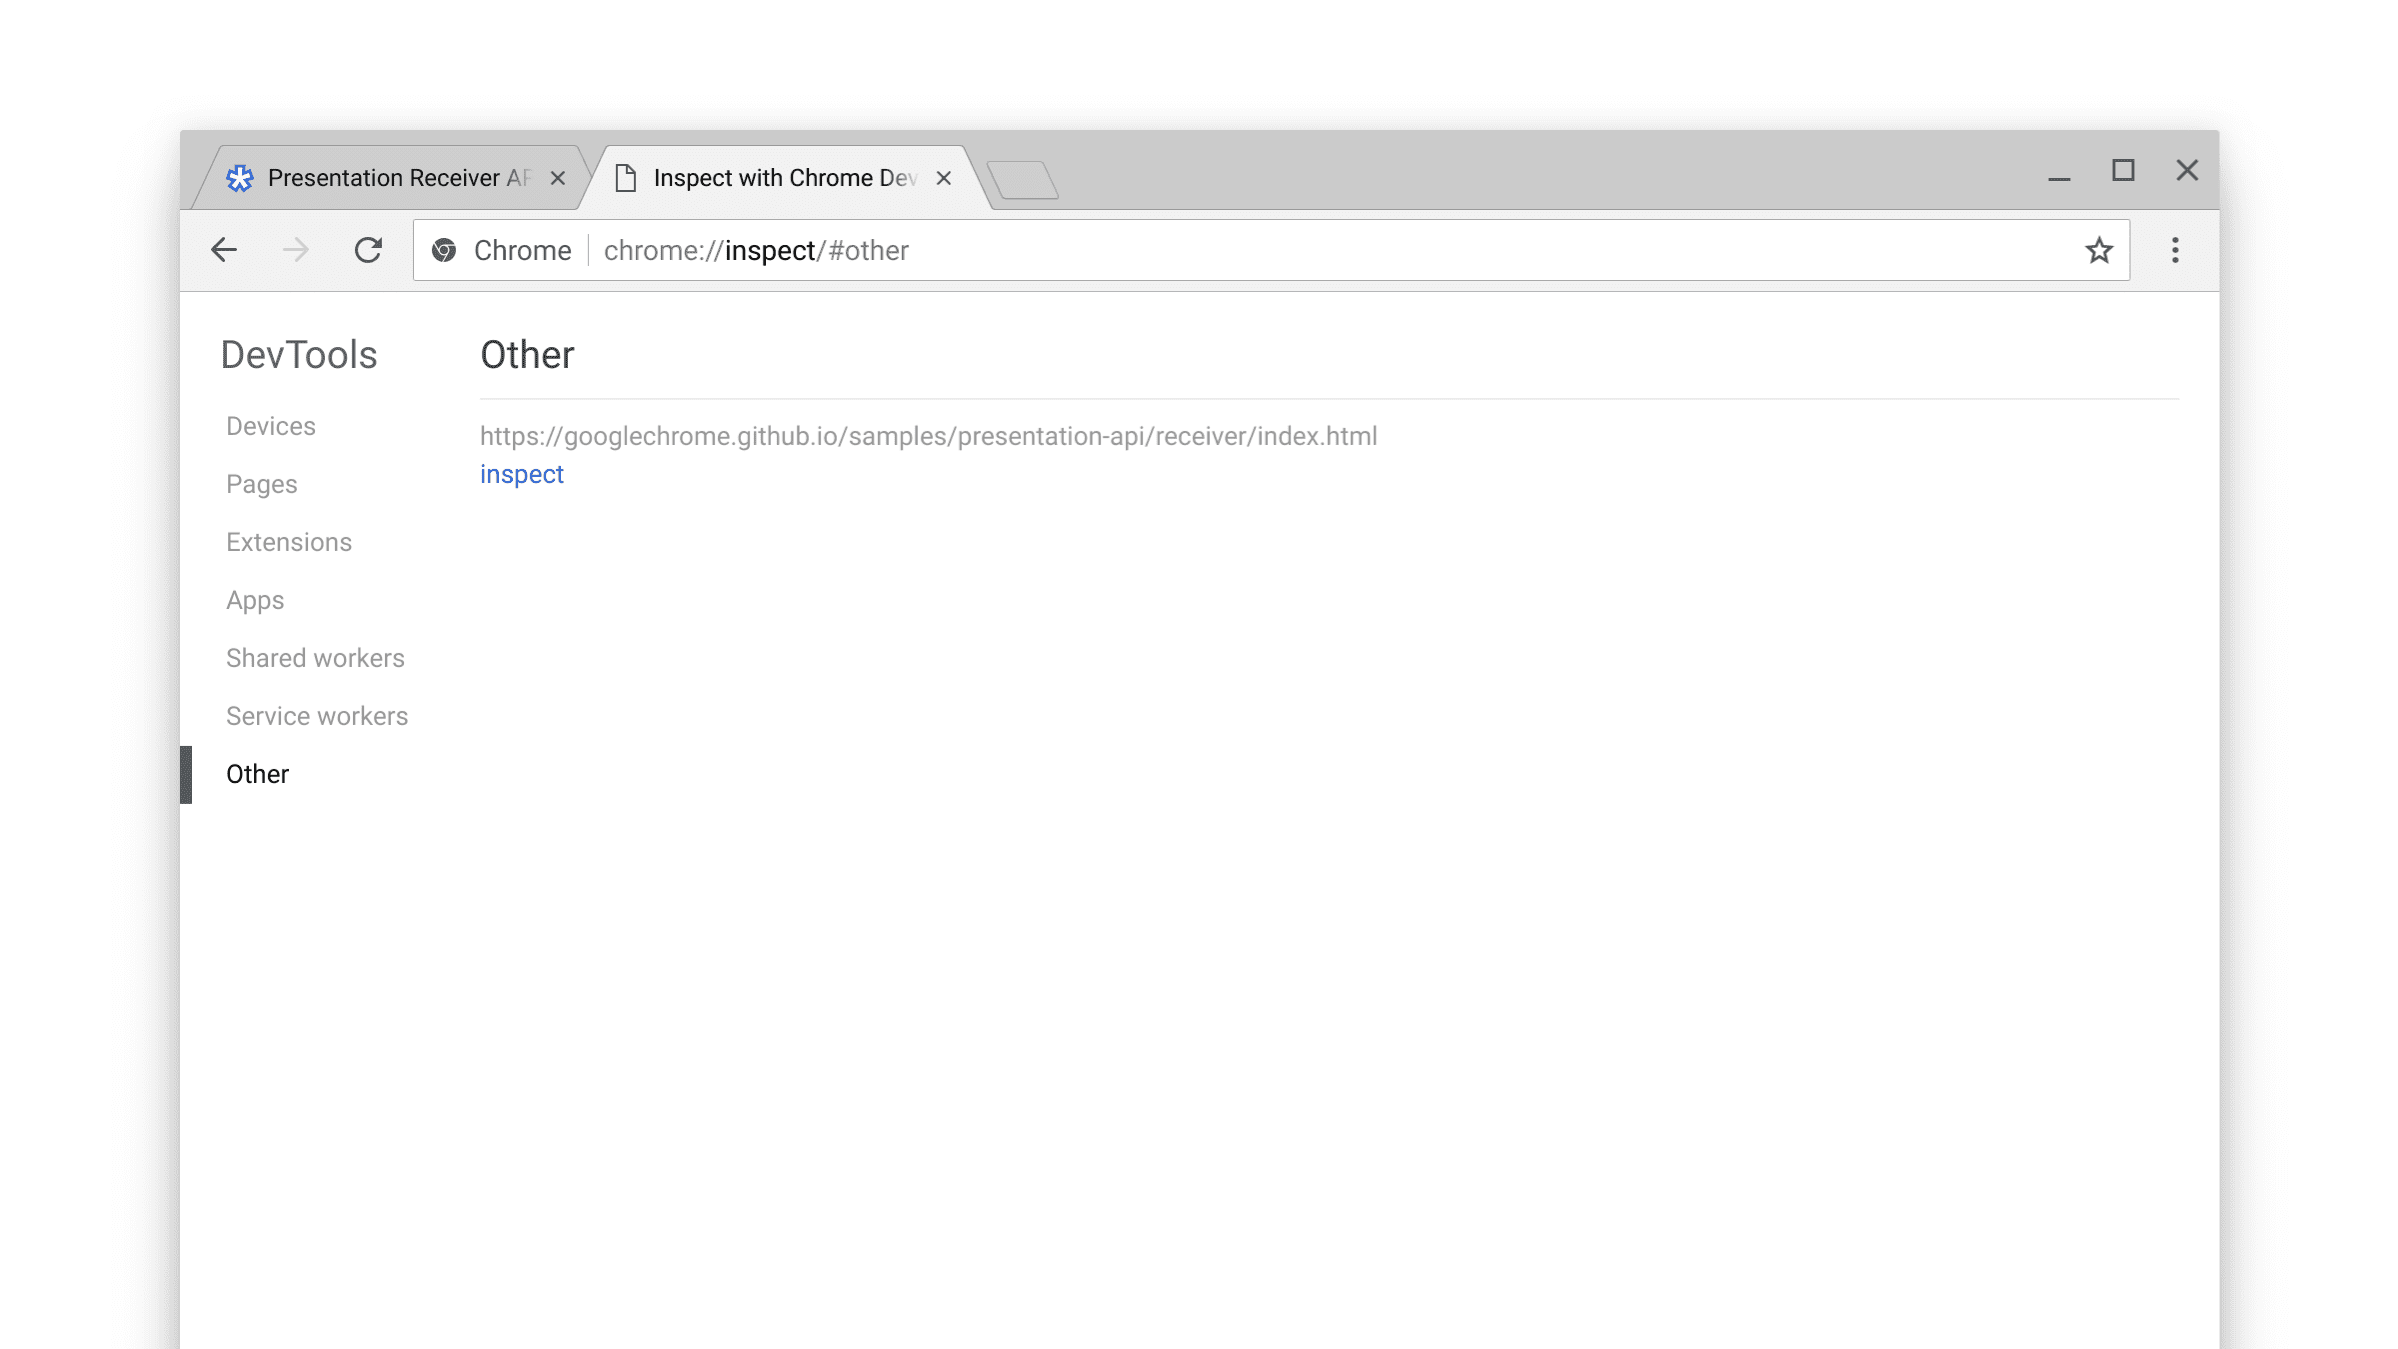
レシーバ ページを検査してデバッグするには、内部の chrome://inspect ページに移動し、[その他] を選択し、現在表示されている URL の横にある [検査] リンクをクリックします。
内部検出/可用性プロセスについて詳しくは、内部の chrome://media-router-internals ページもご覧ください。
次のステップ
Chrome 66 以降では、ChromeOS、Linux、Windows の各プラットフォームがサポートされています。Mac のサポートは後日提供される予定です。
リソース
- Chrome 機能のステータス: https://www.chromestatus.com/features#presentation%20api
- 実装バグ: https://crbug.com/?q=component:Blink>PresentationAPI
- Presentation API の仕様: https://w3c.github.io/presentation-api/
- 仕様に関する問題: https://github.com/w3c/presentation-api/issues