

Chrome 66 允许网页通过 Presentation API 使用附加的辅助显示屏,并通过 Presentation Receiver API 控制其内容。
背景
到目前为止,Web 开发者可以构建这样的体验:用户在 Chrome 中看到的内容不同于在远程显示屏上看到的内容,同时仍可以在本地控制该体验。例如,在电视上播放视频时在 youtube.com 上管理播放队列,或者在笔记本电脑上查看包含演讲者备注的幻灯片片段,同时在 Hangout 会话中显示全屏演示文稿。
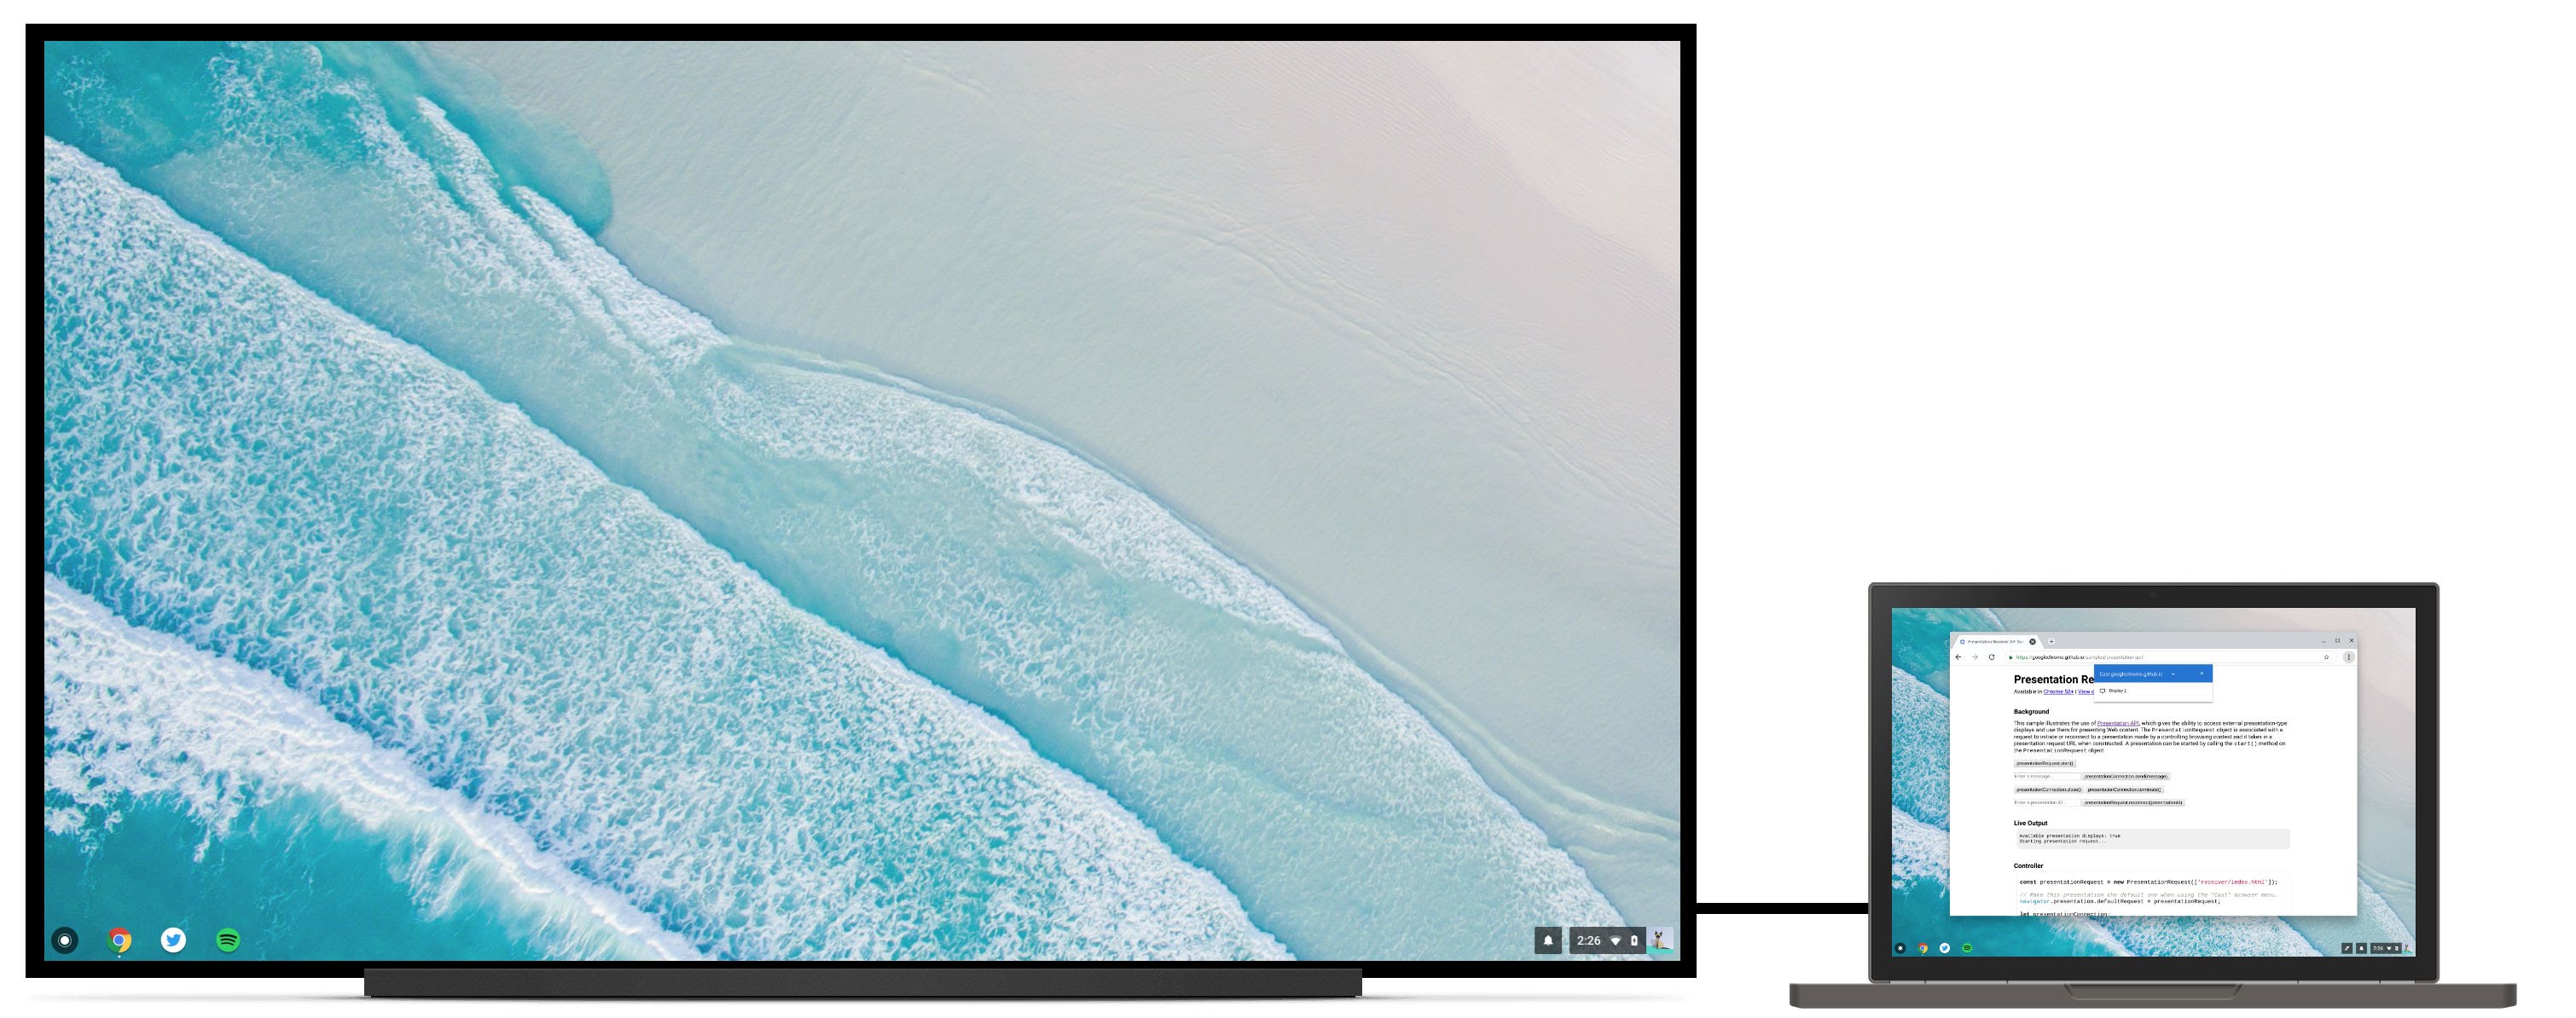
不过,在某些情况下,用户可能只想将内容呈现到第二个连接的显示屏上。例如,假设用户位于配备投影仪的会议室中,并且通过 HDMI 线连接到投影仪。用户真正希望在投影仪上全屏显示幻灯片,而不是将演示文稿镜像到远程端点,以便将笔记本电脑屏幕留作演讲者备注和幻灯片控制之用。虽然网站作者可以通过非常基本的方式支持此功能(例如弹出一个新窗口,然后用户必须将其手动拖动到辅助显示屏并最大化到全屏),但这种方式很麻烦,并且会导致本地和远程演示之间的体验不一致。
呈现页面
我将向您详细介绍如何使用 Presentation API 在连接的辅助显示屏上呈现网页。最终结果可在 https://googlechrome.github.io/samples/presentation-api/ 找到。
首先,我们将创建一个新的 PresentationRequest 对象,其中包含我们要在附加的辅助显示屏上显示的网址。
const presentationRequest = new PresentationRequest('receiver.html');

In this article, I won’t cover use cases where the parameter passed to
`PresentationRequest` can be an array like `['cast://foo’, 'apple://foo',
'https://example.com']` as this is not relevant there.

We can now monitor presentation display availability and toggle a "Present"
button visibility based on presentation displays availability. Note that we can
also decide to always show this button.

<aside class="caution"><b>Caution:</b> The browser may use more energy while the <code>availability</code> object is alive
and actively listening for presentation display availability changes. Please
use it with caution in order to save energy on mobile.</aside>

```js
presentationRequest.getAvailability()
  .then(availability => {
    console.log('Available presentation displays: ' + availability.value);
    availability.addEventListener('change', function() {
      console.log('> Available presentation displays: ' + availability.value);
    });
  })
  .catch(error => {
    console.log('Presentation availability not supported, ' + error.name + ': ' +
        error.message);
  });
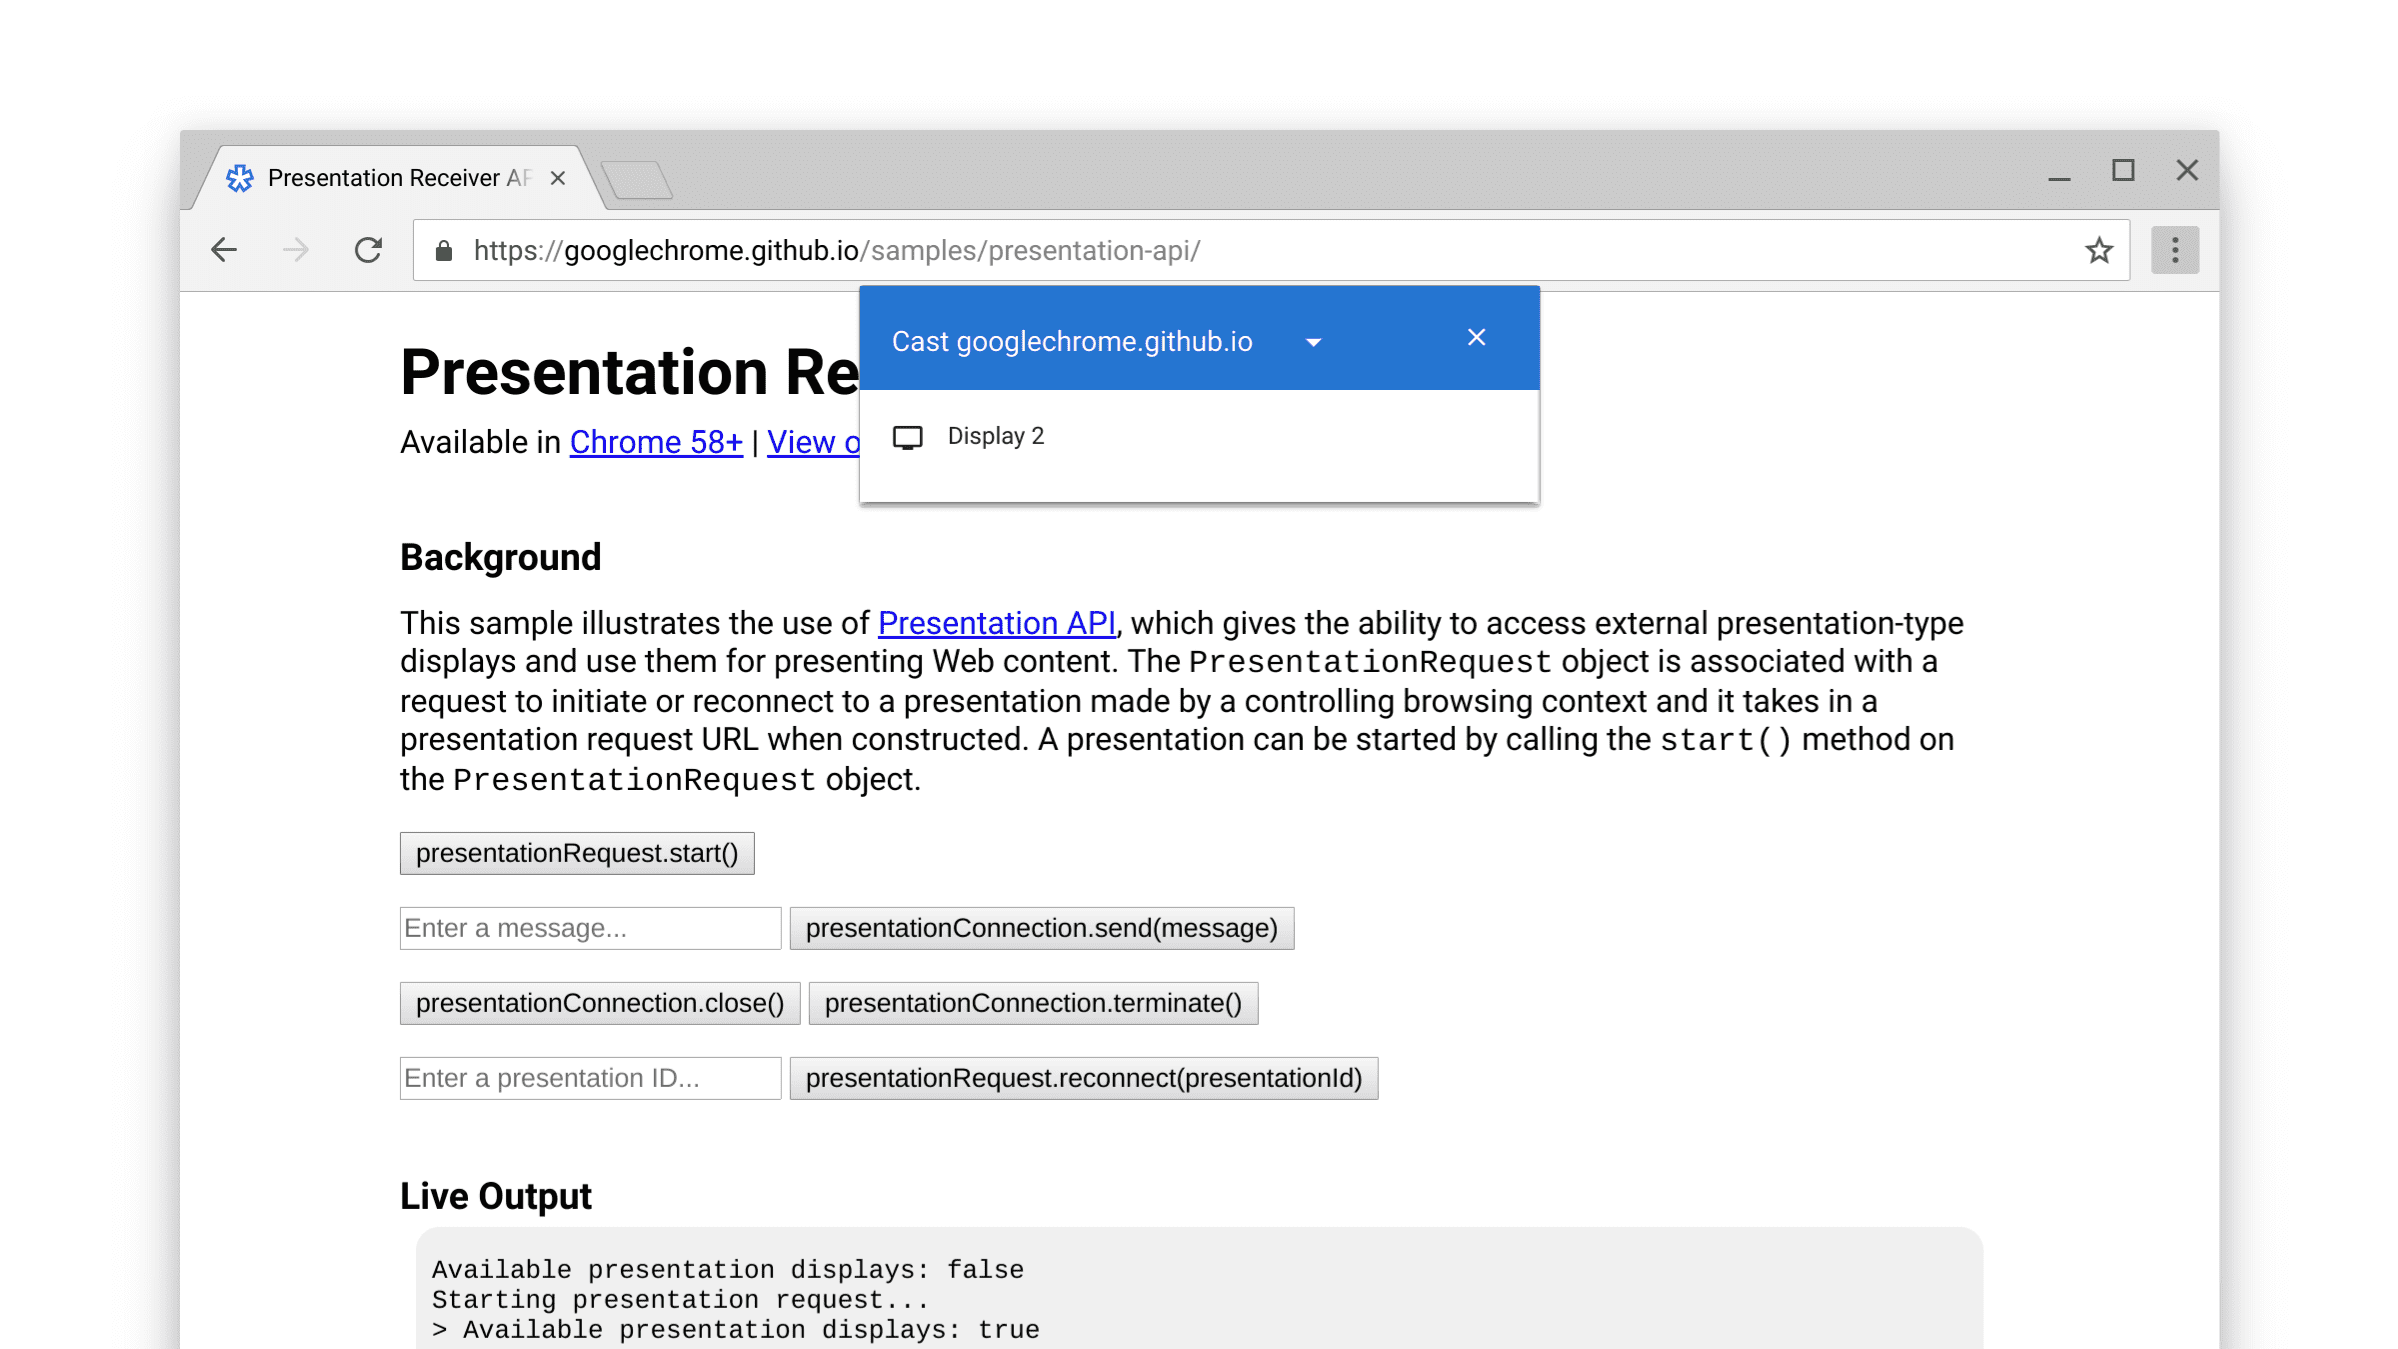
显示演示文稿显示提示需要用户执行手势,例如点击按钮。因此,我们将在用户点击按钮时调用 presentationRequest.start(),并在用户选择演示文稿显示屏(例如,在我们的用例中,是附加的辅助显示屏)后等待 promise 解析。
function onPresentButtonClick() {
  presentationRequest.start()
  .then(connection => {
    console.log('Connected to ' + connection.url + ', id: ' + connection.id);
  })
  .catch(error => {
    console.log(error);
  });
}
如果您已连接到宣传 Chromecast 设备的网络,则向用户显示的列表可能还会包含 Chromecast 设备等远程端点。请注意,镜像显示屏未列入该列表。请参阅 http://crbug.com/840466。
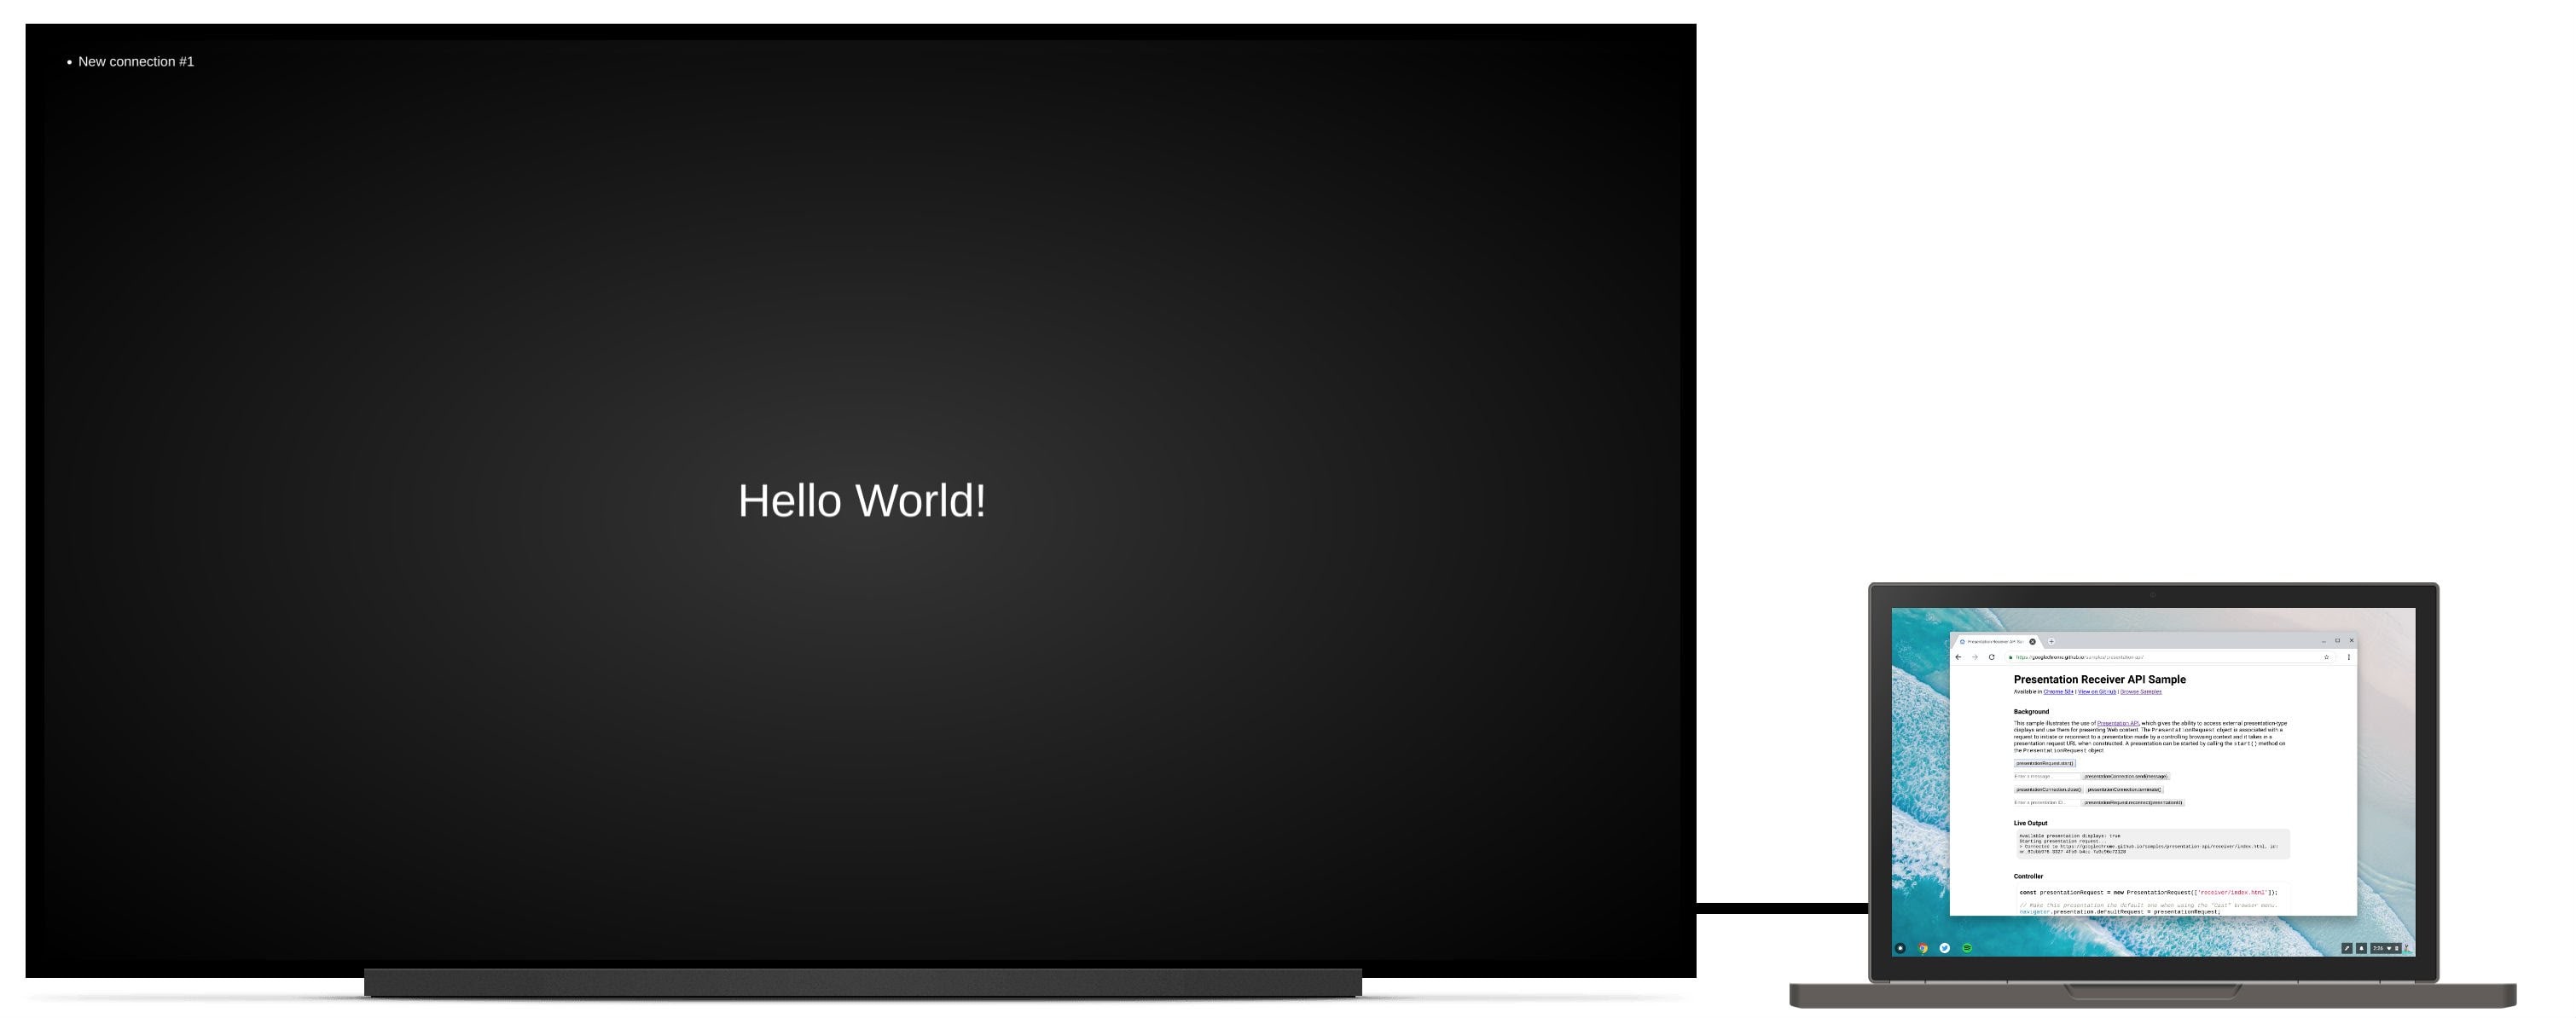
当 promise 解析时,系统会将 PresentationRequest 对象网址中的网页呈现给所选显示屏。Et voilà!
现在,我们可以进一步监控“close”和“terminate”事件,如下所示。请注意,您可以使用 presentationRequest.reconnect(presentationId) 重新连接到“已关闭”的 presentationConnection,其中 presentationId 是上一个 presentationRequest 对象的 ID。
function onCloseButtonClick() {
  // Disconnect presentation connection but will allow reconnection.
  presentationConnection.close();
}

presentationConnection.addEventListener('close', function() {
  console.log('Connection closed.');
});


function onTerminateButtonClick() {
  // Stop presentation connection for good.
  presentationConnection.terminate();
}

presentationConnection.addEventListener('terminate', function() {
  console.log('Connection terminated.');
});
与网页通信
现在,您可能会想,这很不错,但如何在控制器页面(我们刚刚创建的)和接收器页面(我们传递给 PresentationRequest 对象的)之间传递消息?
首先,我们使用 navigator.presentation.receiver.connectionList 检索接收器页面上的现有连接,并监听传入连接,如下所示。
// Receiver page

navigator.presentation.receiver.connectionList
.then(list => {
  list.connections.map(connection => addConnection(connection));
  list.addEventListener('connectionavailable', function(event) {
    addConnection(event.connection);
  });
});

function addConnection(connection) {

  connection.addEventListener('message', function(event) {
    console.log('Message: ' + event.data);
    connection.send('Hey controller! I just received a message.');
  });

  connection.addEventListener('close', function(event) {
    console.log('Connection closed!', event.reason);
  });
}
接收消息的连接会触发您可以监听的“message”事件。消息可以是字符串、Blob、ArrayBuffer 或 ArrayBufferView。发送它就像从控制器页面或接收器页面调用 connection.send(message) 一样简单。
// Controller page

function onSendMessageButtonClick() {
  presentationConnection.send('Hello!');
}

presentationConnection.addEventListener('message', function(event) {
  console.log('I just received ' + event.data + ' from the receiver.');
});
访问 https://googlechrome.github.io/samples/presentation-api/ 试用示例,了解其运作方式。我相信您会和我一样喜欢这款应用。
示例和演示
请查看我们在本文中使用的 Chrome 官方示例。
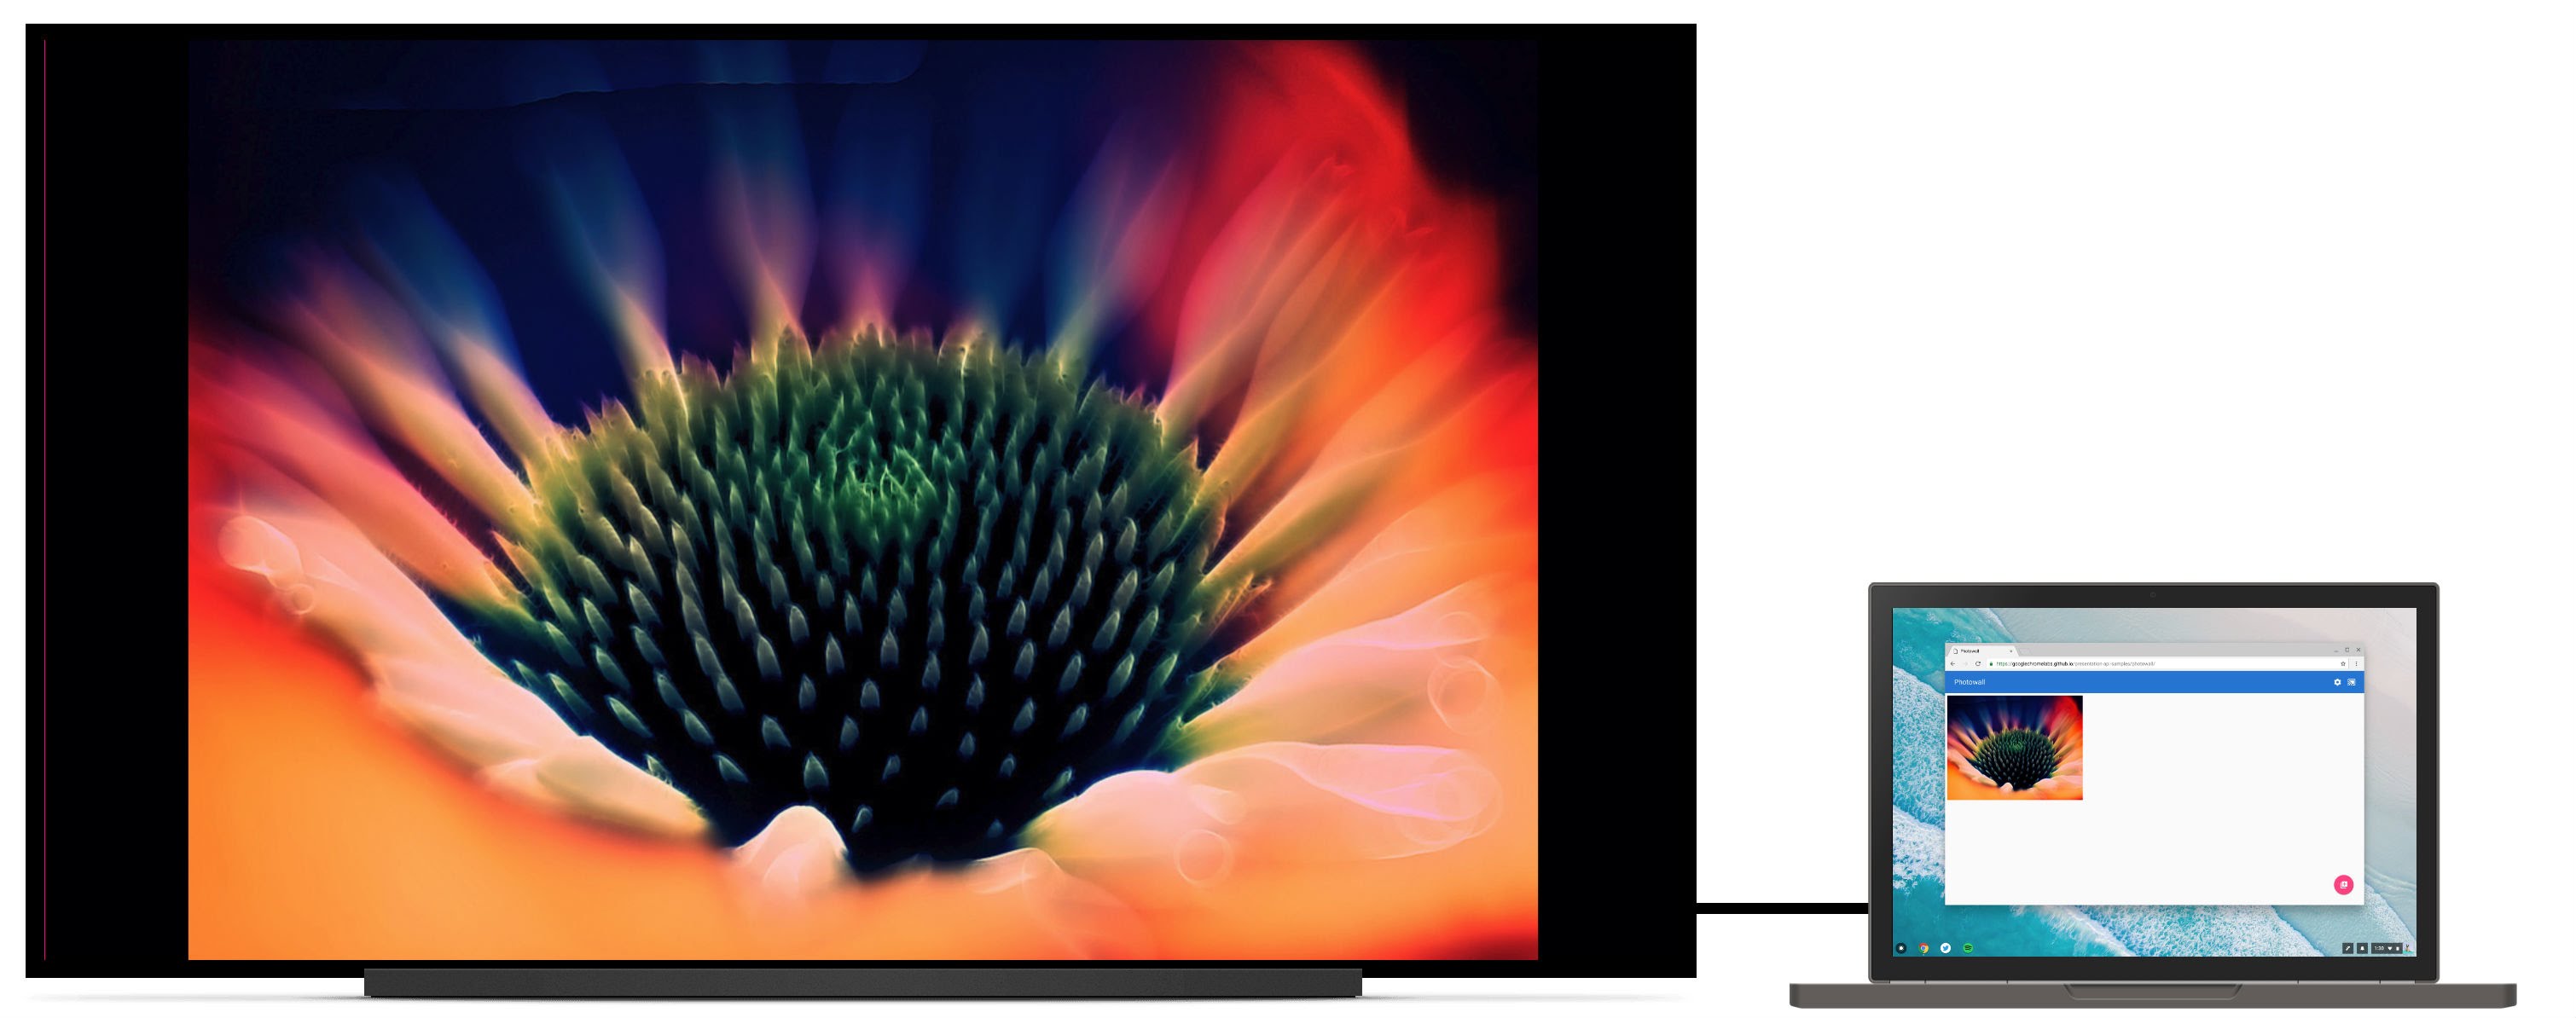
我还建议您查看互动式照片墙演示。借助此 Web 应用,多个控制器可以协同在演示屏幕上呈现照片幻灯片。代码可在 https://github.com/GoogleChromeLabs/presentation-api-samples 找到。
写在最后
Chrome 提供了一个“投屏”浏览器菜单,用户可以在访问网站时随时调用该菜单。如果您想控制此菜单的默认呈现方式,请将 navigator.presentation.defaultRequest 分配给之前创建的自定义 presentationRequest 对象。
// Make this presentation the default one when using the "Cast" browser menu.
navigator.presentation.defaultRequest = presentationRequest;
开发者提示
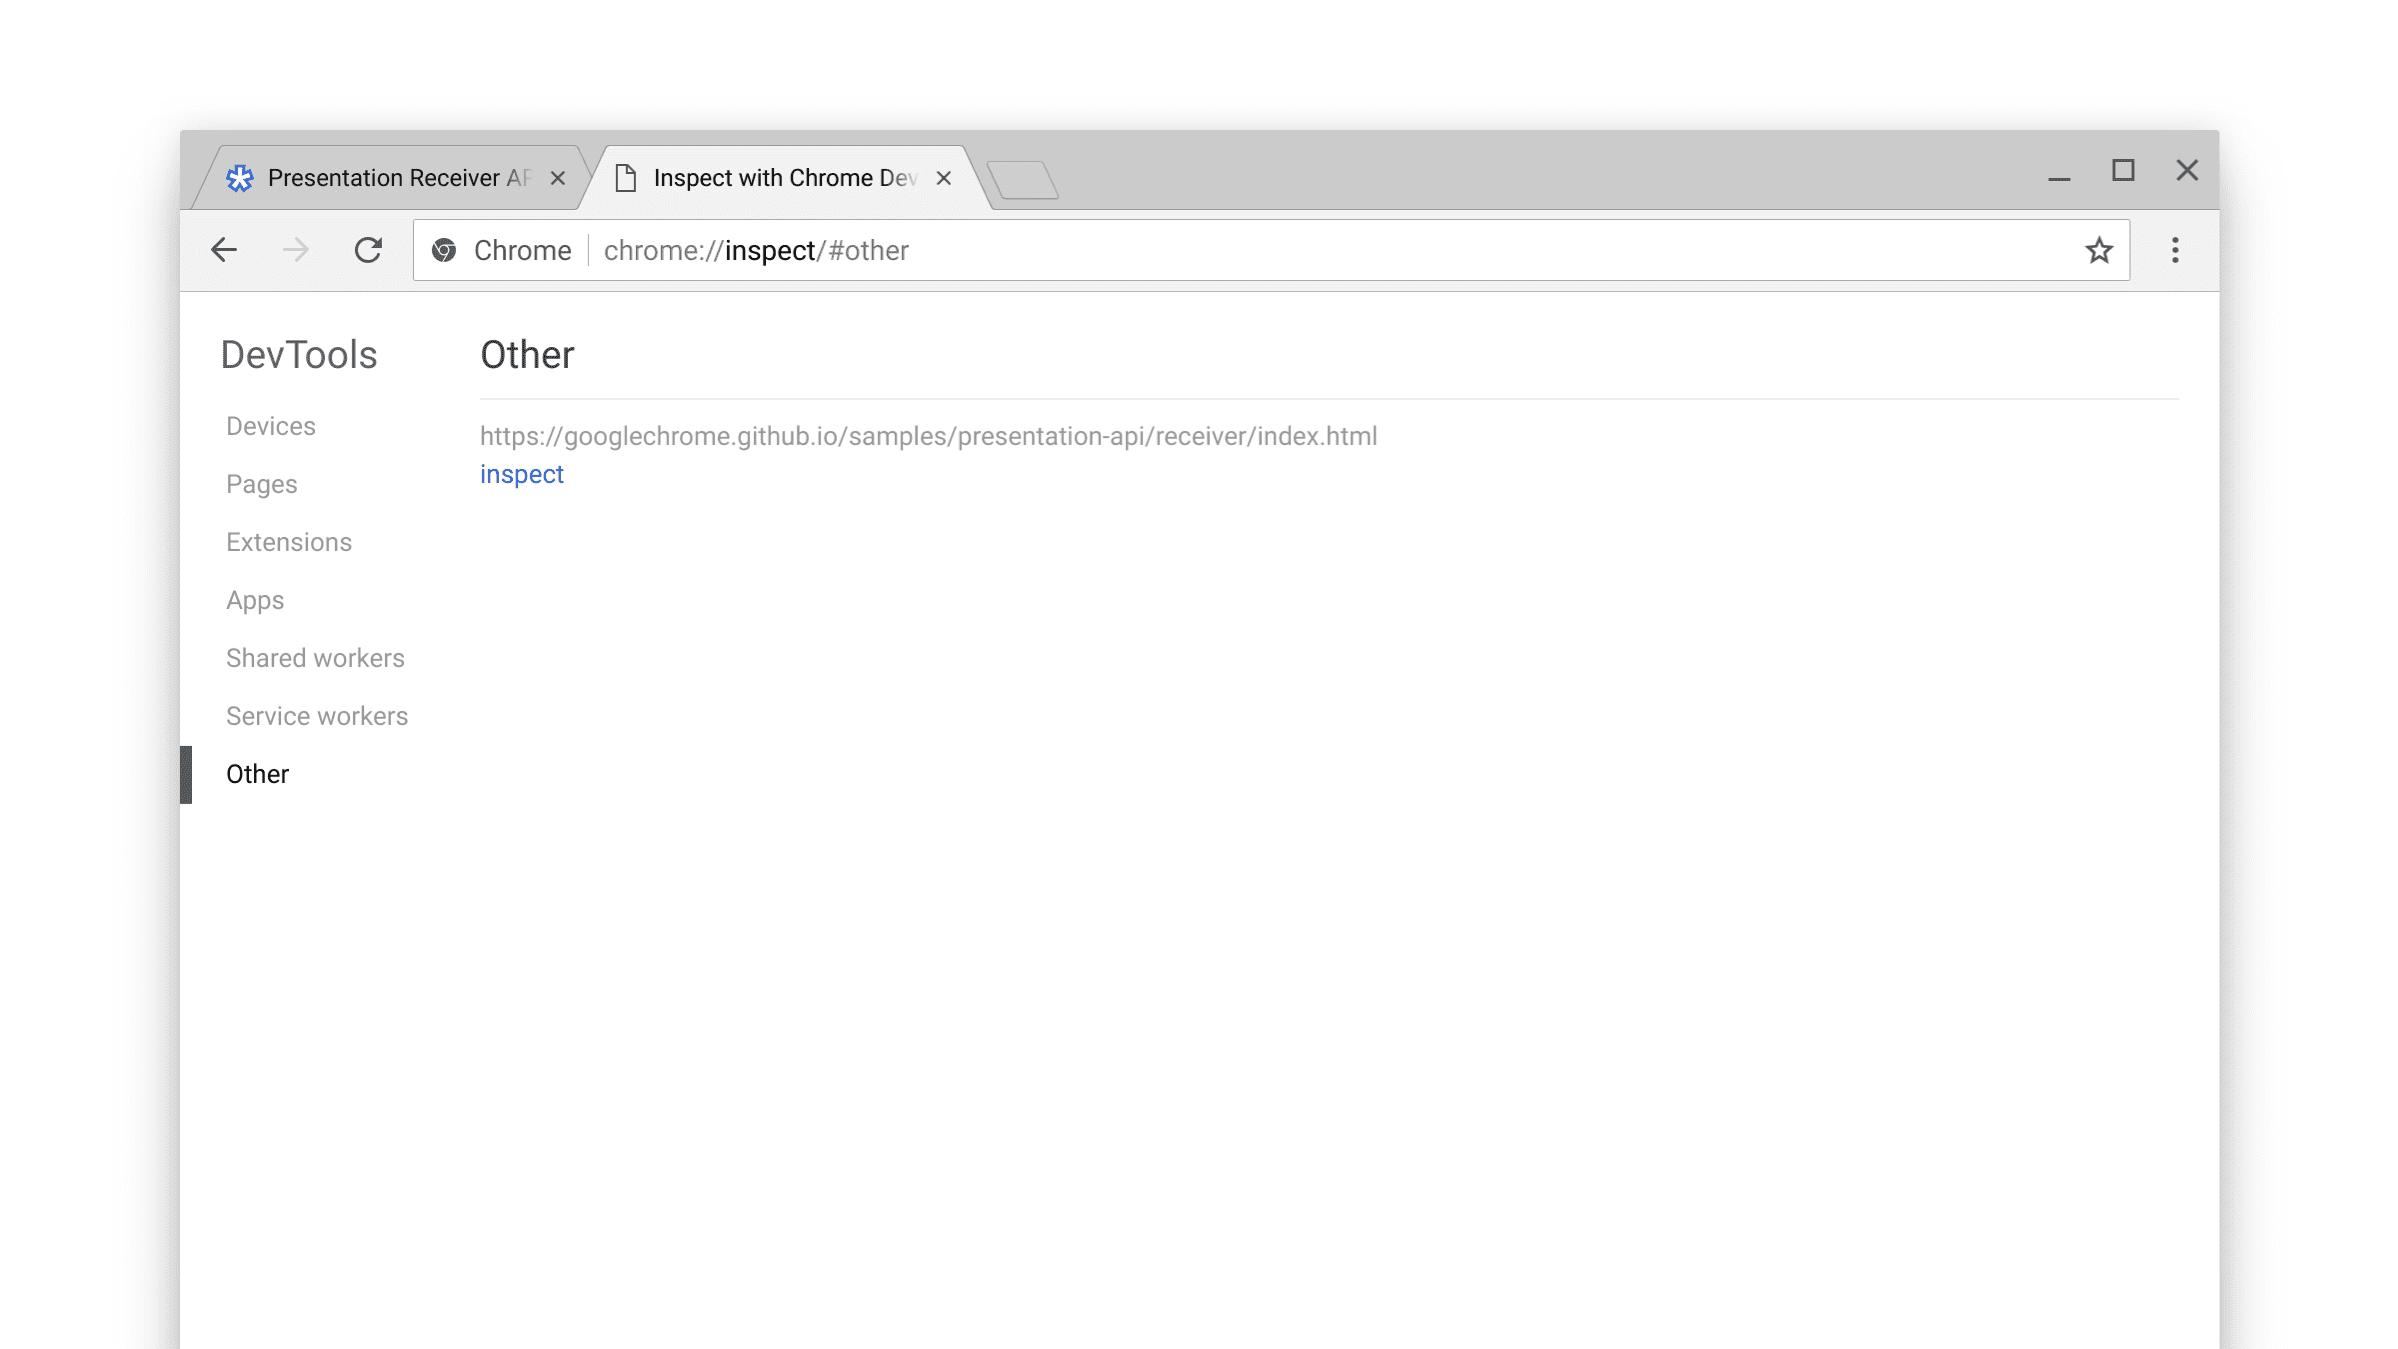
如需检查接收器页面并对其进行调试,请前往内部 chrome://inspect 页面,选择“其他”,然后点击当前显示的网址旁边的“检查”链接。
您还可以查看内部 chrome://media-router-internals 页面,详细了解内部发现/可用性流程。
后续步骤
从 Chrome 66 开始,ChromeOS、Linux 和 Windows 平台受支持。我们会稍后发布对 Mac 的支持。