Chrome 65 中的新功能
从 Chrome 65 开始,CSS Paint API(也称为“CSS 自定义绘制”或“Houdini 的绘制 Worklet”)默认处于启用状态。Google 优惠是什么?您可以用它来做些什么呢?它是如何运作的?好了,请继续阅读…
借助 CSS Paint API,您可以每当 CSS 属性需要图片时,以编程方式生成图片。background-image 或 border-image 等属性通常与 url() 搭配使用来加载图片文件,或与 CSS 内置函数(如 linear-gradient())搭配使用。现在,您可以使用 paint(myPainter) 引用绘制 worklet,而无需使用这些方法。
编写绘制 Worklet
如需定义名为 myPainter 的绘制 Worklet,我们需要使用 CSS.paintWorklet.addModule('my-paint-worklet.js') 加载 CSS 绘制 Worklet 文件。在该文件中,我们可以使用 registerPaint 函数注册绘制 Worklet 类:
class MyPainter {
  paint(ctx, geometry, properties) {
    // ...
  }
}

registerPaint('myPainter', MyPainter);
在 paint() 回调中,我们可以使用 ctx,就像使用 CanvasRenderingContext2D 一样,就像我们从 <canvas> 中了解的那样。如果您知道如何在 <canvas> 中绘制,则可以绘制 Paint 工作流!geometry 会告知我们可用的画布的宽度和高度。properties 我将在本文后面进行介绍。
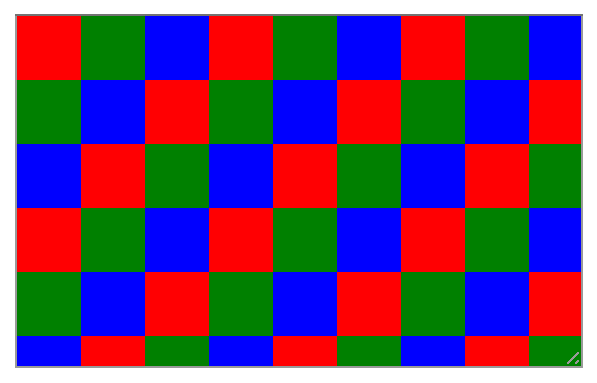
作为入门示例,我们来编写一个棋盘格绘制 Worklet,并将其用作 <textarea> 的背景图片。(我使用 textarea,因为它默认可调整大小。)
<!-- index.html -->
<!doctype html>
<style>
  textarea {
    background-image: paint(checkerboard);
  }
</style>
<textarea></textarea>
<script>
  CSS.paintWorklet.addModule('checkerboard.js');
</script>
// checkerboard.js
class CheckerboardPainter {
  paint(ctx, geom, properties) {
    // Use `ctx` as if it was a normal canvas
    const colors = ['red', 'green', 'blue'];
    const size = 32;
    for(let y = 0; y < geom.height/size; y++) {
      for(let x = 0; x < geom.width/size; x++) {
        const color = colors[(x + y) % colors.length];
        ctx.beginPath();
        ctx.fillStyle = color;
        ctx.rect(x * size, y * size, size, size);
        ctx.fill();
      }
    }
  }
}

// Register our class under a specific name
registerPaint('checkerboard', CheckerboardPainter);
如果您之前使用过 <canvas>,应该会觉得这段代码很熟悉。请点击此处查看实时演示。

与使用常规背景图片相比,这里的不同之处在于,每当用户调整文本区域大小时,系统都会按需重新绘制图案。这意味着,背景图片始终是完全符合需要的大小,包括针对高密度显示屏的补偿。
这很酷,但也相当静态。每次想要相同的图案但不同大小的方块时,我们是否都需要编写新的 Worklet?答案是否定的!
对您的 Worklet 进行参数化
幸运的是,绘制 Worklet 可以访问其他 CSS 属性,这正是额外参数 properties 发挥作用的地方。通过为类提供静态 inputProperties 属性,您可以订阅任何 CSS 属性(包括自定义属性)的更改。系统会通过 properties 参数向您提供这些值。
<!-- index.html -->
<!doctype html>
<style>
  textarea {
    /* The paint worklet subscribes to changes of these custom properties. */
    --checkerboard-spacing: 10;
    --checkerboard-size: 32;
    background-image: paint(checkerboard);
  }
</style>
<textarea></textarea>
<script>
  CSS.paintWorklet.addModule('checkerboard.js');
</script>
// checkerboard.js
class CheckerboardPainter {
  // inputProperties returns a list of CSS properties that this paint function gets access to
  static get inputProperties() { return ['--checkerboard-spacing', '--checkerboard-size']; }

  paint(ctx, geom, properties) {
    // Paint worklet uses CSS Typed OM to model the input values.
    // As of now, they are mostly wrappers around strings,
    // but will be augmented to hold more accessible data over time.
    const size = parseInt(properties.get('--checkerboard-size').toString());
    const spacing = parseInt(properties.get('--checkerboard-spacing').toString());
    const colors = ['red', 'green', 'blue'];
    for(let y = 0; y < geom.height/size; y++) {
      for(let x = 0; x < geom.width/size; x++) {
        ctx.fillStyle = colors[(x + y) % colors.length];
        ctx.beginPath();
        ctx.rect(x*(size + spacing), y*(size + spacing), size, size);
        ctx.fill();
      }
    }
  }
}

registerPaint('checkerboard', CheckerboardPainter);
现在,我们可以对所有不同类型的棋盘使用相同的代码。不过,更棒的是,我们现在可以进入 DevTools 并调整值,直到找到合适的外观。
不支持绘制 worklet 的浏览器
在撰写本文时,只有 Chrome 实现了绘制工作流。虽然所有其他浏览器供应商都给出了积极的信号,但进展并不大。如需了解最新动态,请定期查看 Houdini 准备就绪了吗?。与此同时,请务必使用渐进式增强功能来确保代码能够正常运行,即使不支持绘制工作流也是如此。为确保一切按预期运行,您必须在两个位置调整代码:CSS 和 JS。
如需在 JS 中检测对绘制 Worklet 的支持,可以通过检查 CSS 对象来实现:js
if ('paintWorklet' in CSS) {
CSS.paintWorklet.addModule('mystuff.js');
}
对于 CSS 端,您有两个选项。您可以使用 @supports:
@supports (background: paint(id)) {
  /* ... */
}
更简洁的技巧是利用 CSS 会使包含未知函数的整个属性声明失效,并随后忽略该声明这一事实。如果您两次指定某个属性(先不使用绘制 worklet,然后使用绘制 worklet),则会获得渐进增强效果:
textarea {
  background-image: linear-gradient(0, red, blue);
  background-image: paint(myGradient, red, blue);
}
在支持绘制 worklet 的浏览器中,background-image 的第二个声明会覆盖第一个声明。在不支持绘制 worklet 的浏览器中,第二个声明无效,并会被舍弃,第一个声明会保持有效。
CSS 绘制多填充
对于许多用途,您还可以使用 CSS Paint Polyfill,它可为新型浏览器添加 CSS 自定义绘制和 Paint Worklet 支持。
使用场景
绘制 worklet 有许多用例,其中一些用例比其他用例更明显。其中一个比较明显的改进是使用绘制 worklet 来减小 DOM 的大小。通常,添加元素只是为了使用 CSS 创建装饰。例如,在 Material Design Lite 中,带有涟漪效果的按钮包含 2 个额外的 <span> 元素来实现涟漪本身。如果您有大量按钮,这些按钮会累计产生大量 DOM 元素,并可能导致移动设备上的性能下降。如果您改为使用绘制 Worklet 实现涟漪效果,最终只会添加 0 个元素,并且只有 1 个绘制 Worklet。此外,您还可以获得更易于自定义和参数化的代码。
使用绘制 Worklet 的另一个优势是,在大多数情况下,使用绘制 Worklet 的解决方案在字节数方面较小。当然,这也有弊端:每当画布大小或任何参数发生变化时,绘制代码都会运行。因此,如果您的代码复杂且运行时间较长,可能会导致卡顿。Chrome 正在努力将绘制 worklet 移出主线程,这样即使长时间运行的绘制 worklet 也不会影响主线程的响应能力。
对我来说,最令人兴奋的前景是,绘制 worklet 允许高效地对浏览器尚不支持的 CSS 功能进行 polyfill。例如,您可以通过 polyfill 实现圆锥渐变,直到其在 Chrome 中原生实现。再举一个例子:在 CSS 会议中,决定现在可以使用多种边框颜色。会议期间,我的同事 Ian Kilpatrick 使用绘制 Worklet 为这种新的 CSS 行为编写了 polyfill。
跳出“框架”
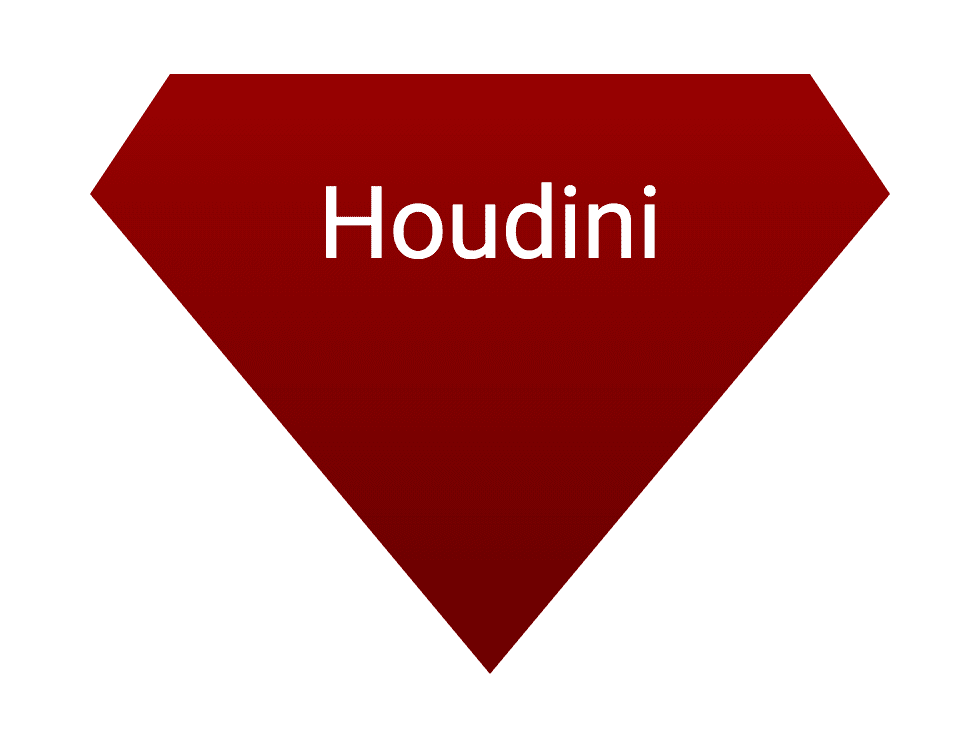
大多数人在了解绘制 Worklet 时,都会开始考虑背景图片和边框图片。绘制 Worklet 的一个不太直观的用例是mask-image让 DOM 元素具有任意形状。例如,钻石:

mask-image 采用与元素大小相同的图片。遮罩图片透明的区域,元素也是透明的。遮罩图片不透明的区域,元素不透明。
现已在 Chrome 中推出
Paint Worklet 已在 Chrome Canary 中推出一段时间了。在 Chrome 65 中,此功能默认处于启用状态。欢迎试用绘图 Worklet 带来的新可能性,并向我们展示您构建的内容!如需获得更多灵感,请查看 Vincent De Oliveira 的集合。

