
요약
Headless Chrome은 Chrome 59부터 제공됩니다. 헤드리스 환경에서 Chrome 브라우저를 실행하는 방법입니다. Chrome 없이 Chrome을 실행하는 것입니다. Chromium 및 Blink 렌더링 엔진에서 제공하는 모든 최신 웹 플랫폼 기능을 명령줄에 제공합니다.
이 점이 유용한 이유는 무엇인가요?
헤드리스 브라우저는 표시되는 UI 셸이 필요 없는 자동 테스트 및 서버 환경에 유용한 도구입니다. 예를 들어 실제 웹페이지에 대해 몇 가지 테스트를 실행하거나, 웹페이지의 PDF를 만들거나, 브라우저에서 URL을 렌더링하는 방식을 검사할 수 있습니다.
헤드리스 시작 (CLI)
헤드리스 모드를 시작하는 가장 쉬운 방법은 명령줄에서 Chrome 바이너리를 여는 것입니다. Chrome 59 이상이 설치된 경우 --headless 플래그를 사용하여 Chrome을 시작합니다.
chrome \
--headless \                   # Runs Chrome in headless mode.
--disable-gpu \                # Temporarily needed if running on Windows.
--remote-debugging-port=9222 \
https://www.chromestatus.com   # URL to open. Defaults to about:blank.
chrome가 Chrome 설치 위치를 가리켜야 합니다. 정확한 위치는 플랫폼마다 다릅니다. 저는 Mac을 사용하고 있으므로 설치한 각 Chrome 버전에 편리한 별칭을 만들었습니다.
Chrome의 안정화 버전 채널을 사용 중이며 베타를 다운로드할 수 없는 경우 chrome-canary를 사용하는 것이 좋습니다.
alias chrome="/Applications/Google\ Chrome.app/Contents/MacOS/Google\ Chrome"
alias chrome-canary="/Applications/Google\ Chrome\ Canary.app/Contents/MacOS/Google\ Chrome\ Canary"
alias chromium="/Applications/Chromium.app/Contents/MacOS/Chromium"
여기에서 Chrome Canary를 다운로드하세요.
명령줄 기능
경우에 따라 헤드리스 Chrome을 프로그래매틱 방식으로 스크립트할 필요가 없을 수도 있습니다. 일반적인 작업을 실행하는 데 사용할 수 있는 몇 가지 유용한 명령줄 플래그가 있습니다.
DOM 인쇄
--dump-dom 플래그는 document.body.innerHTML를 stdout에 출력합니다.
chrome --headless --disable-gpu --dump-dom https://www.chromestatus.com/
PDF 만들기
--print-to-pdf 플래그는 페이지의 PDF를 만듭니다.
chrome --headless --disable-gpu --print-to-pdf https://www.chromestatus.com/
스크린샷 촬영
페이지의 스크린샷을 캡처하려면 --screenshot 플래그를 사용합니다.
chrome --headless --disable-gpu --screenshot https://www.chromestatus.com/

# Size of a standard letterhead.
chrome --headless --disable-gpu --screenshot --window-size=1280,1696 https://www.chromestatus.com/

# Nexus 5x
chrome --headless --disable-gpu --screenshot --window-size=412,732 https://www.chromestatus.com/
--screenshot를 사용하여 실행하면 현재 작업 디렉터리에 screenshot.png라는 파일이 생성됩니다. 전체 페이지 스크린샷을 찾는 경우에는 조금 더 복잡합니다. 데이비드 슈너의 블로그 게시물에서 자세한 내용을 확인하실 수 있습니다. Headless Chrome을 자동 스크린샷 도구로 사용 을 확인하세요.
REPL 모드 (read-eval-print 루프)
--repl 플래그는 명령줄에서 바로 브라우저의 JS 표현식을 평가할 수 있는 모드로 헤드리스를 실행합니다.
$ chrome --headless --disable-gpu --repl --crash-dumps-dir=./tmp https://www.chromestatus.com/
[0608/112805.245285:INFO:headless_shell.cc(278)] Type a Javascript expression to evaluate or "quit" to exit.
>>> location.href
{"result":{"type":"string","value":"https://www.chromestatus.com/features"}}
>>> quit
$
브라우저 UI 없이 Chrome을 디버그하려면 어떻게 해야 하나요?
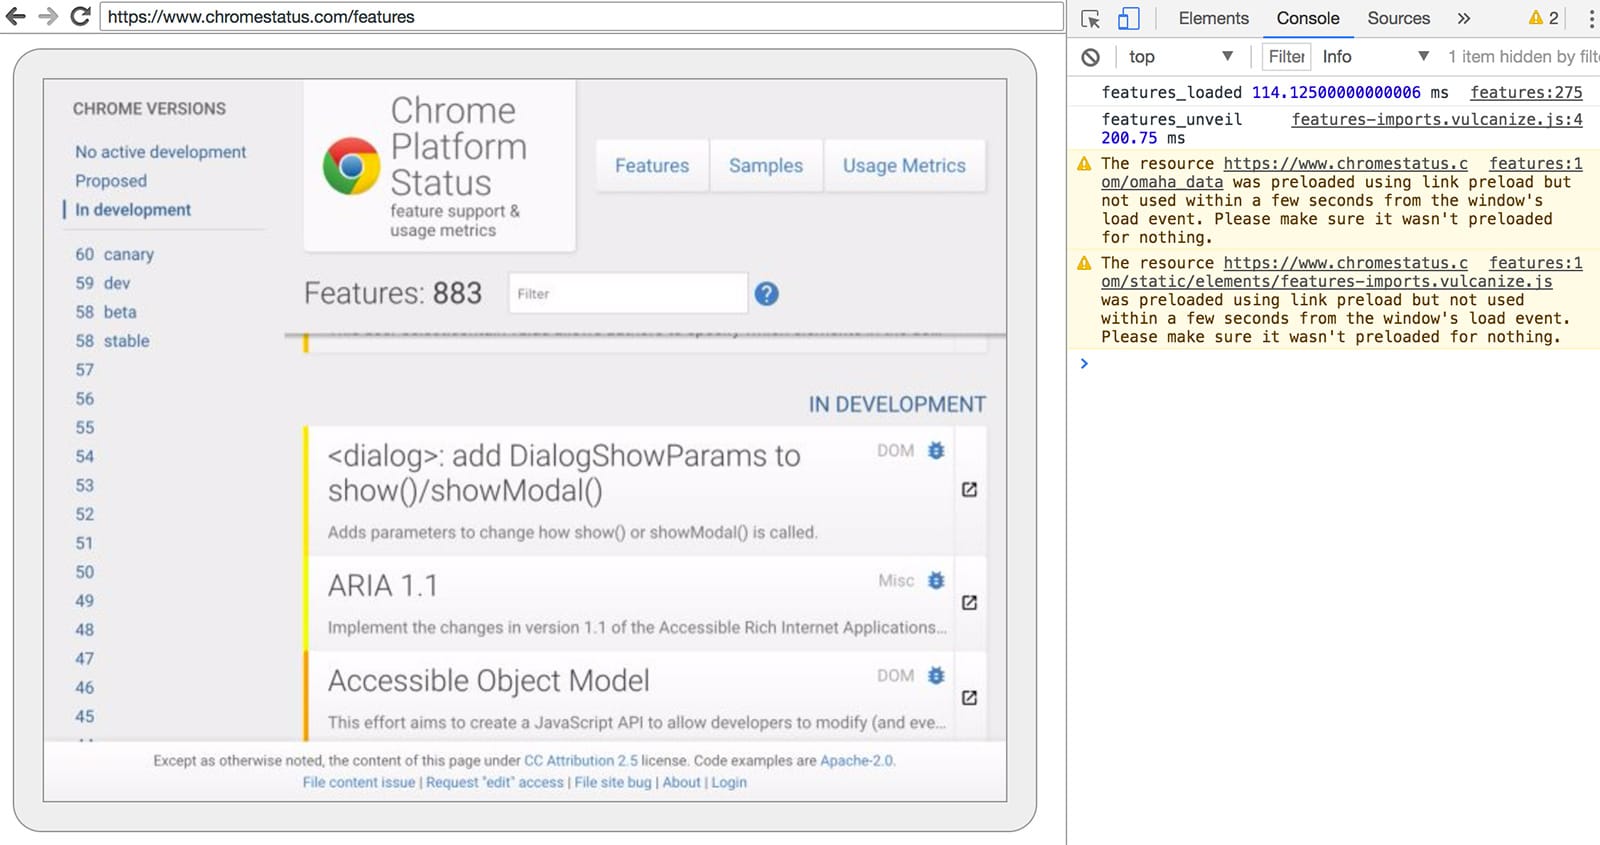
--remote-debugging-port=9222로 Chrome을 실행하면 DevTools 프로토콜이 사용 설정된 인스턴스가 시작됩니다. 이 프로토콜은 Chrome과 통신하고 헤드리스 브라우저 인스턴스를 구동하는 데 사용됩니다. 또한 Sublime, VS Code, Node와 같은 도구가 애플리케이션을 원격 디버그하는 데 사용합니다. #synergy
페이지를 볼 수 있는 브라우저 UI가 없으므로 다른 브라우저에서 http://localhost:9222로 이동하여 모든 것이 작동하는지 확인합니다. 클릭하여 Headless가 렌더링하는 내용을 확인할 수 있는 검사 가능한 페이지 목록이 표시됩니다.
여기에서 익숙한 DevTools 기능을 사용하여 평소와 같이 페이지를 검사, 디버그, 조정할 수 있습니다. Headless를 프로그래매틱 방식으로 사용하는 경우 이 페이지는 브라우저와 통신하는 모든 원시 DevTools 프로토콜 명령어를 확인할 수 있는 강력한 디버깅 도구이기도 합니다.
프로그래매틱 방식으로 사용 (Node)
인형 조종자
Puppeteer는 Chrome팀에서 개발한 Node 라이브러리입니다. 헤드리스(또는 전체) Chrome을 제어하기 위한 고급 API를 제공합니다. Phantom 및 NightmareJS와 같은 다른 자동 테스트 라이브러리와 유사하지만 최신 버전의 Chrome에서만 작동합니다.
Puppeteer는 무엇보다도 쉽게 스크린샷을 찍고, PDF를 만들고, 페이지를 탐색하고, 해당 페이지에 관한 정보를 가져오는 데 사용할 수 있습니다. 브라우저 테스트를 빠르게 자동화하려면 이 라이브러리를 사용하는 것이 좋습니다. DevTools 프로토콜의 복잡성을 숨기고 Chrome의 디버그 인스턴스 실행과 같은 중복 작업을 처리합니다.
설치 방법은 다음과 같습니다.
npm i --save puppeteer
예 - 사용자 에이전트 출력
const puppeteer = require('puppeteer');

(async() => {
  const browser = await puppeteer.launch();
  console.log(await browser.version());
  await browser.close();
})();
예 - 페이지의 스크린샷 찍기
const puppeteer = require('puppeteer');

(async() => {
  const browser = await puppeteer.launch();
  const page = await browser.newPage();
  await page.goto('https://www.chromestatus.com', {waitUntil: 'networkidle2'});
  await page.pdf({path: 'page.pdf', format: 'A4'});

  await browser.close();
})();
전체 API에 관한 자세한 내용은 Puppeteer 문서를 참고하세요.
CRI 라이브러리
chrome-remote-interface는 Puppeteer의 API보다 하위 수준 라이브러리입니다. 하드웨어에 가까워지고 DevTools 프로토콜을 직접 사용하려는 경우 이 방법을 사용하는 것이 좋습니다.
Chrome 실행
chrome-remote-interface는 Chrome을 자동으로 실행하지 않으므로 직접 실행해야 합니다.
CLI 섹션에서는 --headless --remote-debugging-port=9222를 사용하여 Chrome을 수동으로 시작했습니다. 그러나 테스트를 완전히 자동화하려면 애플리케이션 에서 Chrome을 스폰하는 것이 좋습니다.
한 가지 방법은 child_process를 사용하는 것입니다.
const execFile = require('child_process').execFile;

function launchHeadlessChrome(url, callback) {
  // Assuming MacOSx.
  const CHROME = '/Applications/Google\ Chrome.app/Contents/MacOS/Google\ Chrome';
  execFile(CHROME, ['--headless', '--disable-gpu', '--remote-debugging-port=9222', url], callback);
}

launchHeadlessChrome('https://www.chromestatus.com', (err, stdout, stderr) => {
  ...
});
하지만 여러 플랫폼에서 작동하는 휴대용 솔루션을 원한다면 문제가 복잡해집니다. Chrome의 하드코딩된 경로를 살펴보세요. :(
ChromeLauncher 사용
Lighthouse는 웹 앱의 품질을 테스트하는 훌륭한 도구입니다. Chrome을 실행하기 위한 강력한 모듈이 Lighthouse 내에서 개발되었으며 이제 독립형으로 사용하기 위해 추출되었습니다.
chrome-launcher NPM 모듈은 Chrome이 설치된 위치를 찾고, 디버그 인스턴스를 설정하고, 브라우저를 실행하고, 프로그램이 완료되면 종료합니다. 가장 좋은 점은 Node 덕분에 교차 플랫폼에서 작동한다는 것입니다.
기본적으로 chrome-launcher은 Chrome Canary (설치된 경우)를 실행하려고 시도하지만, 이를 변경하여 사용할 Chrome을 수동으로 선택할 수 있습니다. 이를 사용하려면 먼저 npm에서 설치합니다.
npm i --save chrome-launcher
예 - chrome-launcher를 사용하여 헤드리스 실행
const chromeLauncher = require('chrome-launcher');

// Optional: set logging level of launcher to see its output.
// Install it using: npm i --save lighthouse-logger
// const log = require('lighthouse-logger');
// log.setLevel('info');

/**
 * Launches a debugging instance of Chrome.
 * @param {boolean=} headless True (default) launches Chrome in headless mode.
 *     False launches a full version of Chrome.
 * @return {Promise<ChromeLauncher>}
 */
function launchChrome(headless=true) {
  return chromeLauncher.launch({
    // port: 9222, // Uncomment to force a specific port of your choice.
    chromeFlags: [
      '--window-size=412,732',
      '--disable-gpu',
      headless ? '--headless' : ''
    ]
  });
}

launchChrome().then(chrome => {
  console.log(`Chrome debuggable on port: ${chrome.port}`);
  ...
  // chrome.kill();
});
이 스크립트를 실행해도 별다른 작업은 이루어지지 않지만 about:blank를 로드한 Chrome 인스턴스가 작업 관리자에서 실행되는 것을 볼 수 있습니다. 브라우저 UI는 없습니다. 헤드리스입니다.
브라우저를 제어하려면 DevTools 프로토콜이 필요합니다.
페이지에 대한 정보 검색
라이브러리를 설치해 보겠습니다.
npm i --save chrome-remote-interface
예
예 - 사용자 에이전트 출력
const CDP = require('chrome-remote-interface');

...

launchChrome().then(async chrome => {
  const version = await CDP.Version({port: chrome.port});
  console.log(version['User-Agent']);
});
결과는 다음과 같습니다. HeadlessChrome/60.0.3082.0
예 - 사이트에 웹 앱 매니페스트가 있는지 확인
const CDP = require('chrome-remote-interface');

...

(async function() {

const chrome = await launchChrome();
const protocol = await CDP({port: chrome.port});

// Extract the DevTools protocol domains we need and enable them.
// See API docs: https://chromedevtools.github.io/devtools-protocol/
const {Page} = protocol;
await Page.enable();

Page.navigate({url: 'https://www.chromestatus.com/'});

// Wait for window.onload before doing stuff.
Page.loadEventFired(async () => {
  const manifest = await Page.getAppManifest();

  if (manifest.url) {
    console.log('Manifest: ' + manifest.url);
    console.log(manifest.data);
  } else {
    console.log('Site has no app manifest');
  }

  protocol.close();
  chrome.kill(); // Kill Chrome.
});

})();
예: DOM API를 사용하여 페이지의 <title>를 추출합니다.
const CDP = require('chrome-remote-interface');

...

(async function() {

const chrome = await launchChrome();
const protocol = await CDP({port: chrome.port});

// Extract the DevTools protocol domains we need and enable them.
// See API docs: https://chromedevtools.github.io/devtools-protocol/
const {Page, Runtime} = protocol;
await Promise.all([Page.enable(), Runtime.enable()]);

Page.navigate({url: 'https://www.chromestatus.com/'});

// Wait for window.onload before doing stuff.
Page.loadEventFired(async () => {
  const js = "document.querySelector('title').textContent";
  // Evaluate the JS expression in the page.
  const result = await Runtime.evaluate({expression: js});

  console.log('Title of page: ' + result.result.value);

  protocol.close();
  chrome.kill(); // Kill Chrome.
});

})();
Selenium, WebDriver, ChromeDriver 사용
현재 Selenium은 Chrome의 전체 인스턴스를 엽니다. 즉, 자동화된 솔루션이지만 완전히 헤드리스는 아닙니다. 하지만 약간의 작업으로 Selenium을 구성하여 헤드리스 Chrome을 실행할 수 있습니다. 직접 설정하는 방법에 관한 전체 안내를 확인하려면 Headless Chrome으로 Selenium 실행을 참고하세요. 시작하는 데 도움이 되도록 아래에 몇 가지 예시를 넣었습니다.
ChromeDriver 사용
ChromeDriver 2.32는 Chrome 61을 사용하며 headless Chrome과 잘 작동합니다.
설치합니다.
npm i --save-dev selenium-webdriver chromedriver
예:
const fs = require('fs');
const webdriver = require('selenium-webdriver');
const chromedriver = require('chromedriver');

const chromeCapabilities = webdriver.Capabilities.chrome();
chromeCapabilities.set('chromeOptions', {args: ['--headless']});

const driver = new webdriver.Builder()
  .forBrowser('chrome')
  .withCapabilities(chromeCapabilities)
  .build();

// Navigate to google.com, enter a search.
driver.get('https://www.google.com/');
driver.findElement({name: 'q'}).sendKeys('webdriver');
driver.findElement({name: 'btnG'}).click();
driver.wait(webdriver.until.titleIs('webdriver - Google Search'), 1000);

// Take screenshot of results page. Save to disk.
driver.takeScreenshot().then(base64png => {
  fs.writeFileSync('screenshot.png', new Buffer(base64png, 'base64'));
});

driver.quit();
WebDriverIO 사용
WebDriverIO는 Selenium WebDriver 위에 있는 상위 수준 API입니다.
설치합니다.
npm i --save-dev webdriverio chromedriver
예: chromestatus.com에서 CSS 기능 필터링
const webdriverio = require('webdriverio');
const chromedriver = require('chromedriver');

const PORT = 9515;

chromedriver.start([
  '--url-base=wd/hub',
  `--port=${PORT}`,
  '--verbose'
]);

(async () => {

const opts = {
  port: PORT,
  desiredCapabilities: {
    browserName: 'chrome',
    chromeOptions: {args: ['--headless']}
  }
};

const browser = webdriverio.remote(opts).init();

await browser.url('https://www.chromestatus.com/features');

const title = await browser.getTitle();
console.log(`Title: ${title}`);

await browser.waitForText('.num-features', 3000);
let numFeatures = await browser.getText('.num-features');
console.log(`Chrome has ${numFeatures} total features`);

await browser.setValue('input[type="search"]', 'CSS');
console.log('Filtering features...');
await browser.pause(1000);

numFeatures = await browser.getText('.num-features');
console.log(`Chrome has ${numFeatures} CSS features`);

const buffer = await browser.saveScreenshot('screenshot.png');
console.log('Saved screenshot...');

chromedriver.stop();
browser.end();

})();
추가 자료
다음은 시작하는 데 도움이 되는 유용한 리소스입니다.
문서
- DevTools 프로토콜 뷰어 - API 참조 문서
도구
- chrome-remote-interface: DevTools 프로토콜을 래핑하는 노드 모듈
- Lighthouse: 웹 앱 품질을 테스트하는 자동화 도구로, 프로토콜을 많이 사용합니다.
- chrome-launcher - 자동화할 준비가 된 Chrome 실행용 노드 모듈
데모
- '헤드리스 웹': Paul Kinlan의 api.ai에서 헤드리스를 사용하는 방법에 관한 훌륭한 블로그 게시물입니다.
FAQ
--disable-gpu 플래그가 필요하나요?
Windows에서만 사용할 수 있습니다. 다른 플랫폼에서는 더 이상 필요하지 않습니다. --disable-gpu 플래그는 몇 가지 버그에 대한 임시 해결 방법입니다. 향후 Chrome 버전에서는 이 플래그가 필요하지 않습니다. 자세한 내용은 crbug.com/737678을 참고하세요.
그래서 Xvfb가 여전히 필요한가요?
아니요. 헤드리스 Chrome은 창을 사용하지 않으므로 Xvfb와 같은 디스플레이 서버가 더 이상 필요하지 않습니다. 이 없이도 자동 테스트를 실행할 수 있습니다.
Xvfb란 무엇인가요? Xvfb는 Unix와 유사한 시스템을 위한 메모리 내 디스플레이 서버로, 연결된 실제 디스플레이 없이 그래픽 애플리케이션 (예: Chrome)을 실행할 수 있습니다. 많은 사용자가 Xvfb를 사용하여 이전 버전의 Chrome을 실행하여 '헤드리스' 테스트를 실행합니다.
헤드리스 Chrome을 실행하는 Docker 컨테이너를 만들려면 어떻게 해야 하나요?
lighthouse-ci를 확인하세요. node:8-slim를 기본 이미지로 사용하고 App Engine Flex에 설치하고 Lighthouse를 실행하는 Dockerfile 예시가 있습니다.
Selenium / WebDriver / ChromeDriver와 함께 사용할 수 있나요?
예. Selenium, WebDriver, ChromeDriver 사용하기를 참고하세요.
PhantomJS와 어떤 관련이 있나요?
Headless Chrome은 PhantomJS와 같은 도구와 유사합니다. 둘 다 헤드리스 환경에서 자동 테스트에 사용할 수 있습니다. 두 가지의 주요 차이점은 Phantom은 이전 버전의 WebKit을 렌더링 엔진으로 사용하는 반면 Headless Chrome은 최신 버전의 Blink를 사용한다는 것입니다.
현재 Phantom은 DevTools 프로토콜보다 높은 수준의 API도 제공합니다.
버그는 어디에 신고하나요?
헤드리스 Chrome 관련 버그는 crbug.com에서 신고하세요.
DevTools 프로토콜의 버그는 github.com/ChromeDevTools/devtools-protocol에서 신고하세요.